Overview
The CSV ⇄ JSON Converter transforms tabular data (spreadsheets, databases) into JSON format used by APIs and modern applications - and vice versa. It's a bidirectional tool that handles both CSV to JSON and JSON to CSV conversions with full support for custom delimiters, nested JSON flattening, and output minification.
Interface overview
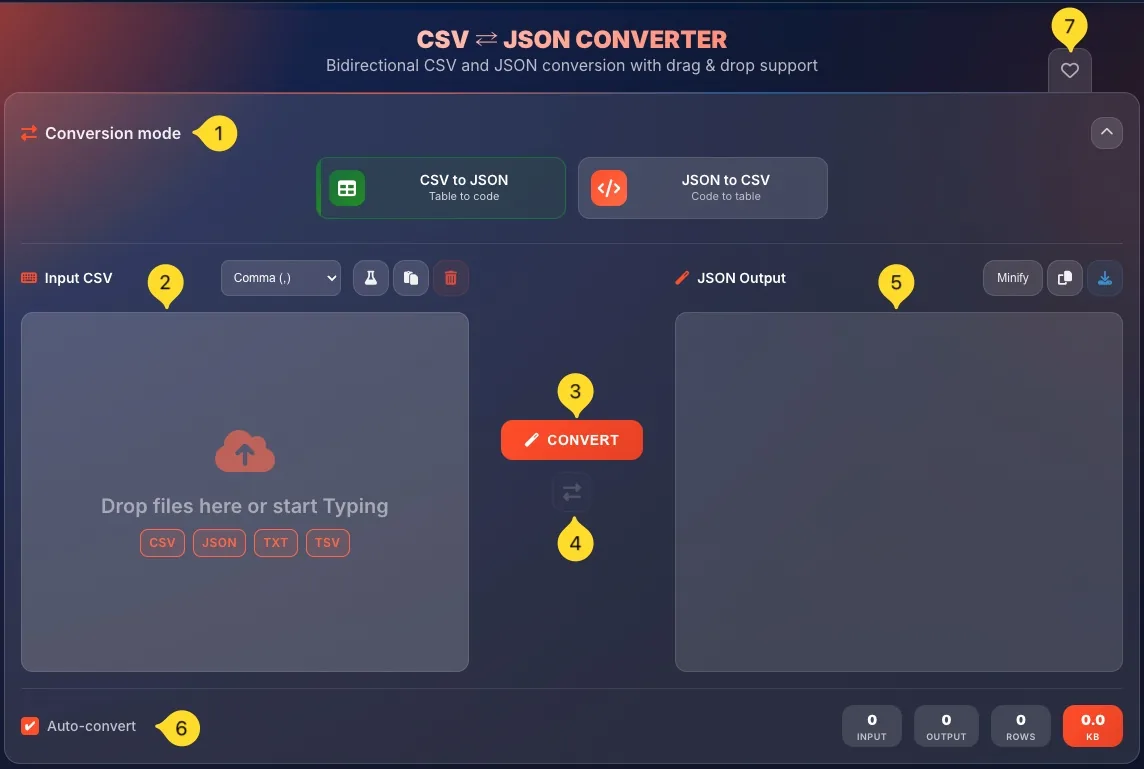
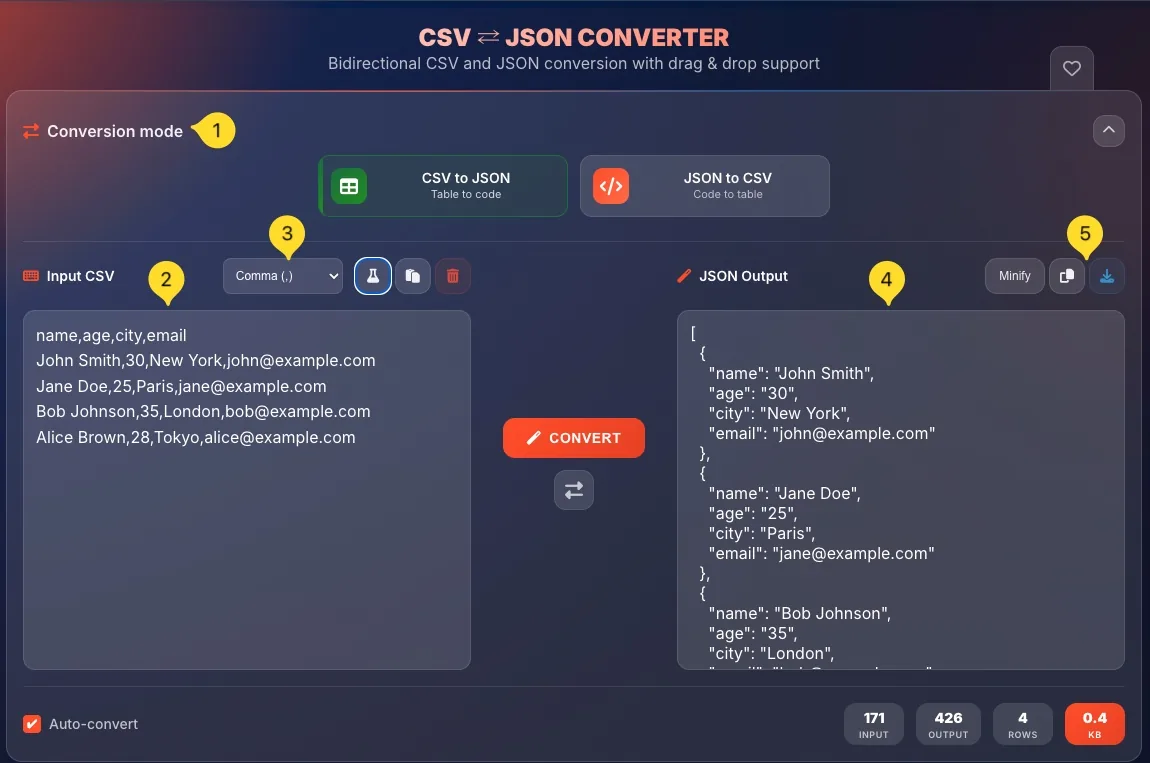
The CSV ⇄ JSON Converter has a clean two-panel layout with mode selector at the top. Here's what you'll see:
Conversion mode selector (top)
At the top, you'll find Conversion mode: a collapsible section with two mode buttons:
• CSV to JSON (Table to code) - converts spreadsheet data to JSON
• JSON to CSV (Code to table) - converts JSON arrays to spreadsheet format
Click a mode button to switch. The selected mode is visually highlighted.
Input panel (left)
The left panel is where you enter your data:
• Header with label (Input CSV or Input JSON depending on mode)
• Options dropdown: delimiter selector (CSV mode) or flatten options (JSON mode)
• Action buttons: Demo, Paste, Clear
• Drop zone: Drop files here or start typing
• Supported formats displayed as badges - CSV, JSON, TXT, TSV
CONVERT button (center)
The orange CONVERT button sits between the two panels. Click it to perform the conversion.
Note: If Auto-convert is enabled (default), conversion happens automatically.
Swap button
Below the CONVERT button, you'll see a swap icon (⇄). Click it to quickly swap the contents of input and output panels and switch modes. Swap icon is inactive until you insert some data.
Output panel (right)
The right panel shows your converted result:
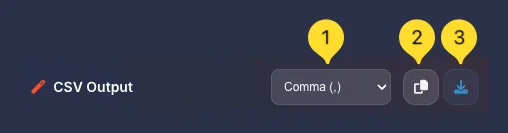
• Header with label (JSON Output or CSV Output)
• Options: Minify button (CSV to JSON) or delimiter dropdown (JSON to CSV)
• Action buttons: Copy, Download
Bottom section
At the bottom:
• Auto-convert checkbox (checked by default) - converts automatically as you type
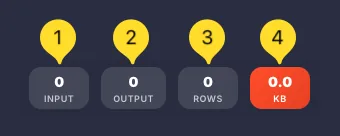
• Statistics: INPUT (chars), OUTPUT (chars), ROWS (data rows), KB (file size in orange)
Favorites (top right)
Click the heart icon in the top right corner to add CSV ⇄ JSON Converter to your favorites for quick access from the homepage.
Conversion modes
The converter offers two modes that work in opposite directions:
• CSV to JSON: transforms tabular/spreadsheet data into JSON arrays
• JSON to CSV: transforms JSON arrays back into tabular format
Both modes are fully featured with their own specific options. The interface adapts based on which mode is selected.
CSV to JSON mode Table to code
CSV to JSON mode converts comma-separated (or other delimiter) data into JSON format. This is the default mode when you open the tool.
Input - CSV data
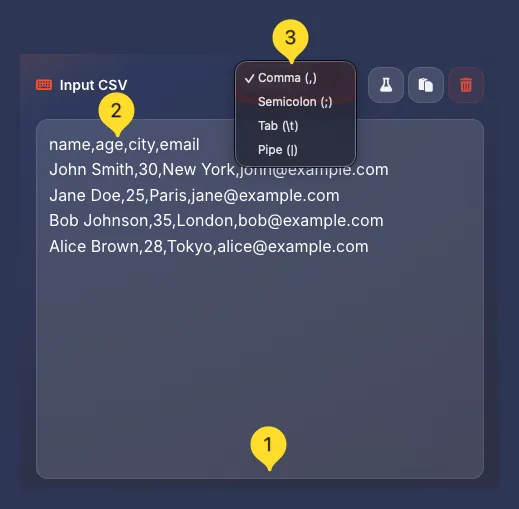
Your input is tabular data - rows separated by line breaks, columns separated by a delimiter (comma by default).
Example input:name,email,ageJohn,[email protected],28Jane,[email protected],34
First row as headers
The first row is treated as column headers. These become the property names in your JSON output.
• First row: name,email,age
• JSON properties: "name", "email", "age"
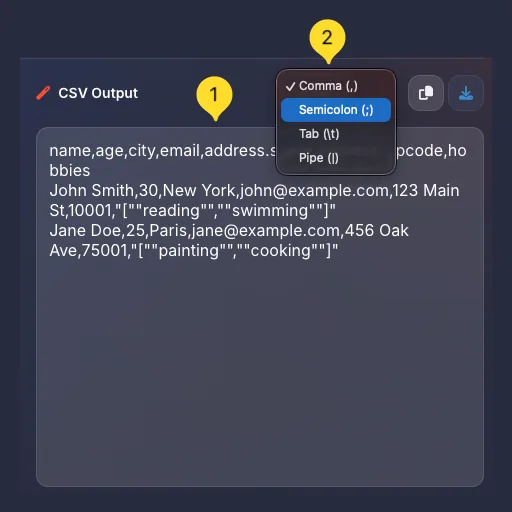
Delimiter selection
Use the delimiter dropdown in the input panel header to select your CSV separator:
• Comma (,) - default, most common
• Semicolon (;) - common in European exports
• Tab - for TSV files
• Pipe (|) - for special data formats
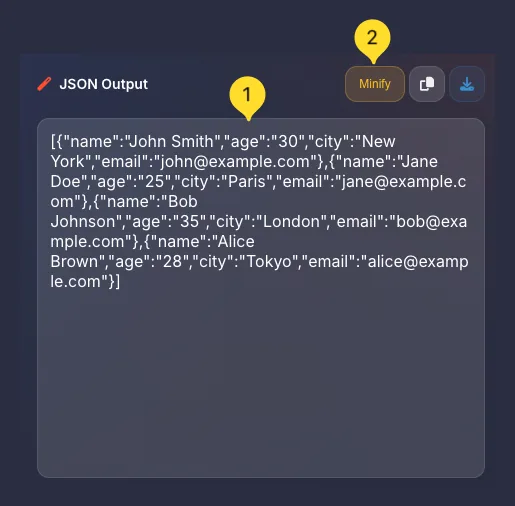
Output - JSON array
The output is a JSON array of objects. Each row becomes an object, each column becomes a property.
Example output:[{"name":"John","email":"[email protected]","age":"28"}, ...]
Minify option
Click the Minify button in the output panel to toggle between:
• Pretty (default) - formatted with indentation for readability
• Minified: compact single line for smaller file size
INPUT (CSV):
name,email,age
John Doe,[email protected],28
Jane Smith,[email protected],34

OUTPUT (JSON):
[
  {
    "name": "John Doe",
    "email": "[email protected]",
    "age": "28"
  },
  {
    "name": "Jane Smith",
    "email": "[email protected]",
    "age": "34"
  }
]
JSON to CSV mode Code to table
JSON to CSV mode converts JSON arrays of objects into tabular format that can be opened in spreadsheets like Excel or Google Sheets.
Input - JSON array
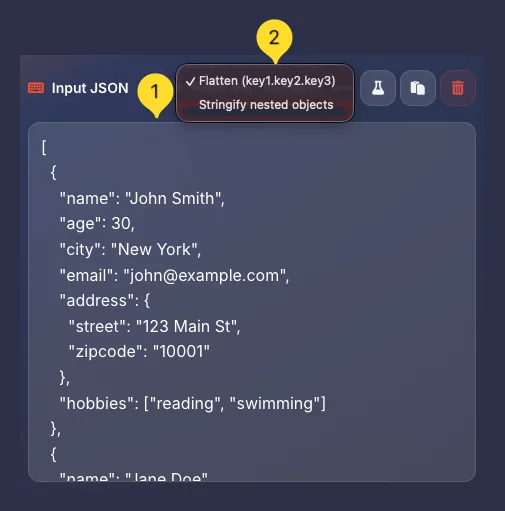
Your input should be a JSON array of objects. Each object becomes a row, each property becomes a column.
Example input:[{"name":"John","email":"[email protected]"}, ...]
Flatten option
Use the Flatten dropdown in the input panel header to handle nested JSON objects:
• Flatten (key1.key2.key3): nested properties become dot-notation columns
• Other options may include stringifying or ignoring nested data
Handling nested objects
If your JSON has nested objects like {"user":{"name":"John"}}, the flatten option creates a column named user.name with value "John".
This keeps all your data accessible in the flat CSV format.
Output delimiter
Use the delimiter dropdown in the output panel header to choose your CSV separator:
• Comma (,): opens in most spreadsheet apps
• Semicolon (;): better for European Excel versions
• Tab: creates TSV format
Output - CSV data
The output is CSV text with:
• First row - column headers from JSON property names
• Subsequent rows - data values
Values properly quoted if they contain the delimiter
INPUT (JSON):
[
  {"name": "John Doe", "email": "[email protected]", "age": 28},
  {"name": "Jane Smith", "email": "[email protected]", "age": 34}
]

OUTPUT (CSV):
name,email,age
John Doe,[email protected],28
Jane Smith,[email protected],34
How to convert
Converting data is simple. Follow these steps:
Select conversion mode
Choose your direction:
• CSV to JSON: if you have spreadsheet/tabular data
• JSON to CSV: if you have JSON arrays
Enter your data
Input your data by:
• Typing directly in the input panel
• Pasting from clipboard (click Paste button, Ctrl+V or ⌘+V on Mac)
• Dropping a file onto the drop zone
• Uploading via the Upload button
Configure options
Adjust settings as needed:
• CSV to JSON: Select input delimiter, toggle Minify
• JSON to CSV: Select flatten option, choose output delimiter
View the result
If Auto-convert is enabled (default), the result appears immediately.
If disabled, click the orange CONVERT button.
Copy or download
Use the output panel buttons:
• Copy: copy to clipboard
• Download: save as .json or .csv file
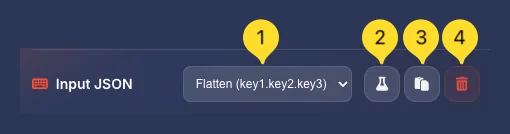
Input panel actions
The input panel has several action buttons in the header (top right):
Delimiter dropdown
The dropdown changes based on mode:
• CSV to JSON: Delimiter selector (Comma, Semicolon, Tab, Pipe)
• JSON to CSV: Flatten options for nested objects
Upload button
Click the cloud upload icon to open a file picker and select a file to upload. Supported formats: CSV, JSON, TXT, TSV. You can also drag and drop files directly onto the drop zone.
Load demo button
Click the demo icon to load sample data into the input panel. This helps you quickly test the converter or understand the expected input format.
Paste button
Click the clipboard icon to paste text from your clipboard into the input panel. Equivalent to pressing Ctrl+V (or ⌘+V on Mac).
Clear button
Click the trash icon to clear all content from the input panel. This also clears the output and resets statistics.

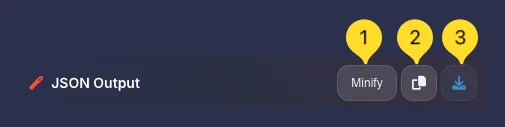
Output panel actions
The output panel shows your converted result with these action buttons:
Minify button (CSV to JSON only)
In CSV to JSON mode, click the Minify button to toggle output formatting:
• Pretty (default) - indented, human-readable
• Minified: compact single line, smaller file size
Minify is useful when you need the smallest possible JSON file.
Delimiter dropdown (JSON to CSV only)
In JSON to CSV mode, select the output delimiter:
• Comma (,): standard CSV
• Semicolon (;): European format
• Tab: TSV format
Copy button
Click the copy icon to copy the converted output to your clipboard. A notification confirms the copy.
Download button
Click the download icon to save the result as a file:
• CSV to JSON: Downloads as .json file
• JSON to CSV: Downloads as .csv file
Delimiter options
CSV files can use different characters to separate columns. The converter supports multiple delimiters:
Comma (,)
The standard delimiter for CSV files. Use this for:
• Most CSV files from any source
• International data exchange
• Programming and API contexts
Semicolon (;)
Common in European regions where comma is the decimal separator. Use this for:
• Excel exports from European Windows
• German, French, Italian regional settings
• Files that won't open correctly with comma
Tab
Creates TSV (Tab-Separated Values) format. Use this for:
• Data with many commas in values
• Database exports
• Scientific data
Pipe (|)
Less common but useful when data contains commas and semicolons. Use this for:
• Special database exports
• Data with complex text values
Flatten options (JSON to CSV) JSON to CSV
When converting JSON to CSV, nested objects need special handling since CSV is a flat format. The Flatten dropdown controls this:
The problem with nested JSON
JSON can have nested objects:{"user": {"name": "John", "email": "[email protected]"}}
CSV is flat - it can't have objects inside cells. The flatten option solves this.
Flatten (key1.key2.key3)
The default option flattens nested objects using dot notation:
• user.name → column named user.name
• user.email → column named user.email
This preserves all data in a flat structure.
Example
Input:{"id": 1, "user": {"name": "John", "age": 28}}
Output (flattened):id,user.name,user.age1,John,28
When to use
Use flattening when:
• You need all nested data in your spreadsheet
• You want to preserve the structure information
• Your JSON has one level of nesting
Minify option (CSV to JSON) CSV to JSON
The Minify button in CSV to JSON mode controls JSON output formatting:
Pretty format (default)
When Minify is OFF, JSON output is formatted with:
• Indentation (2 spaces)
• Line breaks between properties
• Easy to read and debug
Use for: development, debugging, documentation
Minified format
When Minify is ON, JSON output is:
• Single line, no whitespace
• Smallest possible file size
• Harder to read but more efficient
Use for: production, APIs, storage
Size difference
Minification can significantly reduce file size:
• Pretty: 500 bytes
• Minified: 300 bytes
The larger your data, the bigger the savings.
Auto-convert feature
The Auto-convert checkbox at the bottom controls automatic conversion:
When enabled (default)
Conversion happens automatically as you:
• Type in the input panel
• Paste content
• Upload a file
• Change options (delimiter, flatten, minify)
You don't need to click the CONVERT button.
When disabled
You must click the orange CONVERT button to trigger conversion. The output won't update automatically.
Useful when working with very large files where instant conversion might be slow.
Performance consideration
For very large datasets (thousands of rows), you might want to disable auto-convert to:
• Prevent lag while typing
• Control exactly when conversion happens
• Review input before converting

Swap button
The swap button (⇄ icon) below the CONVERT button provides a quick way to reverse your conversion:
What it does
Clicking the swap button:
• Moves output content to input panel
• Switches to the opposite conversion mode
• Clears the output panel
• Triggers conversion (if auto-convert is on)
Use case - Round-trip conversion
You converted CSV to JSON and now want to go back:
• Click the swap button
• Your JSON moves to input
• Mode switches to JSON to CSV
• You get your CSV back
Use case - Verify conversion
Not sure your conversion is correct? Swap and convert back - if you get the same data, conversion worked correctly.
Statistics
Four counters in the bottom right track your conversion in real-time:
INPUT
Shows the character count of your input data. Helps you gauge the size of your source data.
OUTPUT
Shows the character count of the converted output. Compare with INPUT to see how size changes.
ROWS
Shows the number of data rows (excluding header row for CSV). This tells you how many records/objects your data contains.
KB (orange)
Shows the file size in kilobytes of the output. The highlight makes it easy to spot.
Useful for estimating download size or checking if minification helped.
Understanding CSV format
CSV (Comma-Separated Values) is the simplest data interchange format. Understanding its structure helps you get better conversions.
Basic structure
CSV files contain:
• Rows: separated by line breaks
• Columns: separated by a delimiter (usually comma)
• Header row (optional) - first row naming each column
• Data rows: actual data values
Headers become JSON keys
The first row typically names each column: name,email,age
These become the property names in JSON. Without headers, columns would be named generically (col1, col2, etc.).
Handling special characters
If a value contains the delimiter (e.g., comma), it must be wrapped in quotes:
• Value: Smith, John
• In CSV: "Smith, John"
The converter handles this automatically.
Common delimiters
While commas are standard, other delimiters are common:
• Comma (,): most common, international standard
• Semicolon (;): European Excel exports
• Tab: TSV (Tab-Separated Values) files
• Pipe (|): some database exports
Common use cases
Here are practical scenarios where CSV ⇄ JSON Converter saves time:
Tips & Best practices
Frequently asked questions
"42" instead of 42. This is standard CSV behavior - you may need to parse numbers in your application code.
• Check the delimiter (European Excel uses semicolons)
• Ensure UTF-8 encoding when saving
• Remove any BOM (Byte Order Mark) if present
user.name become column headers. For deeply nested JSON (3+ levels), consider restructuring first.
[{...}, {...}]. Single objects, arrays of primitives [1,2,3], or invalid JSON won't convert properly.
"Smith, John". Most applications do this automatically when exporting. The converter handles quoted values correctly.