Overview
The GPX ⇄ KML Converter is a powerful tool for working with GPS route files. It supports 4 different modes: convert between GPX and KML formats, merge multiple routes into one, or split a single route into segments. All operations include a live satellite map preview so you can verify your routes before converting.
Interface overview
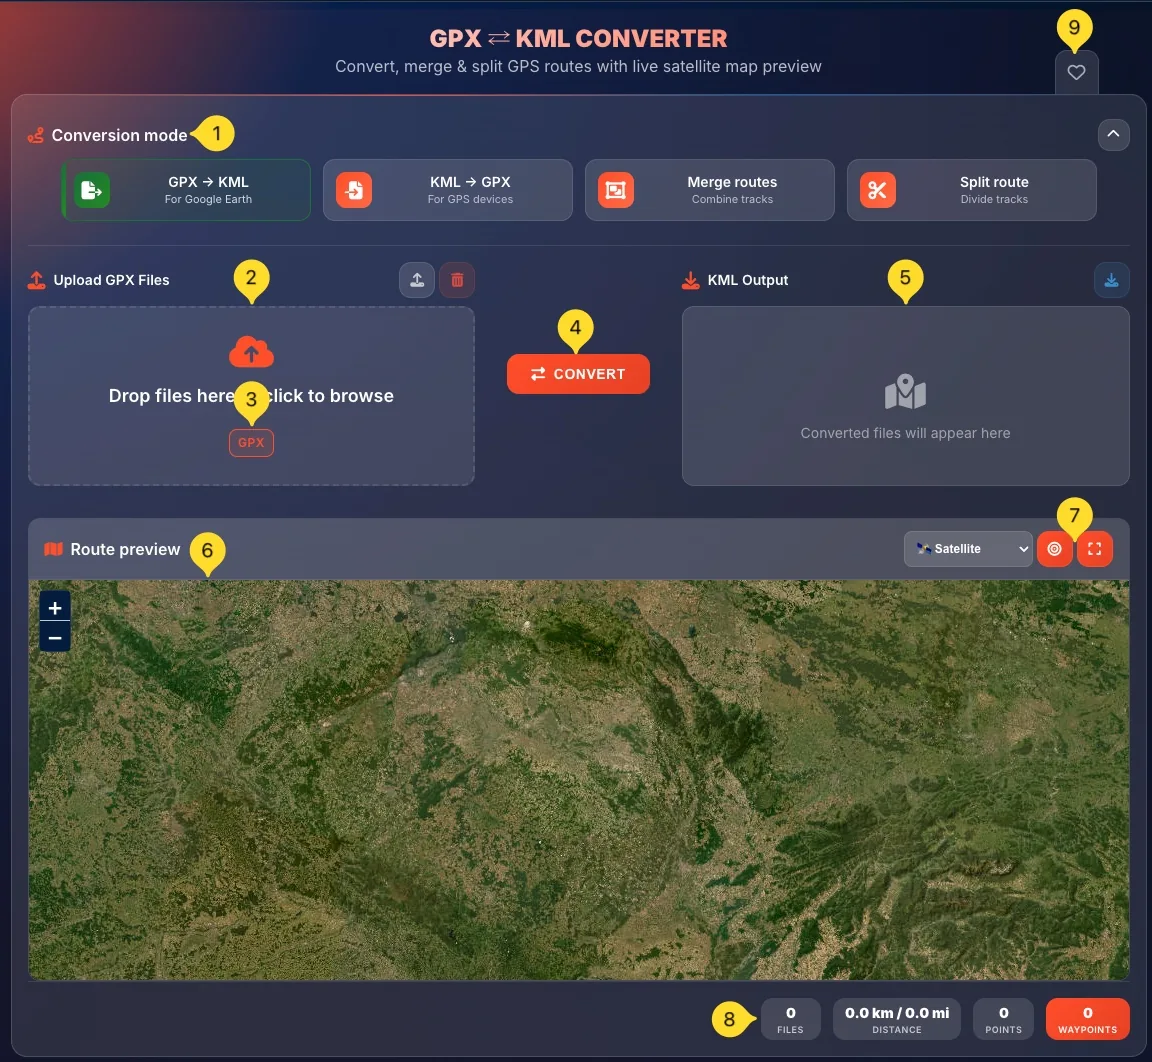
The GPX ⇄ KML Converter has a clean, organized interface. Here's what you'll find on the screen:
Conversion mode selector
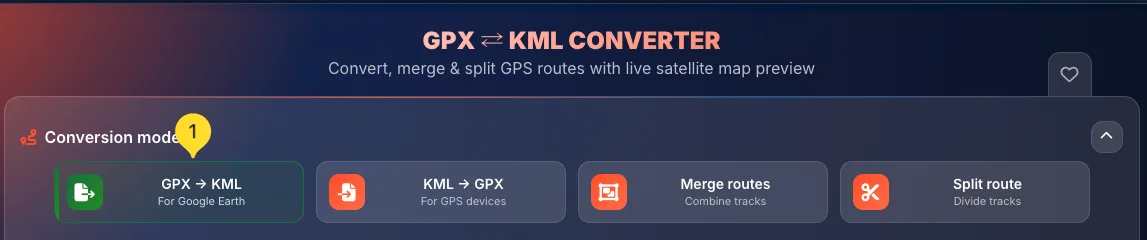
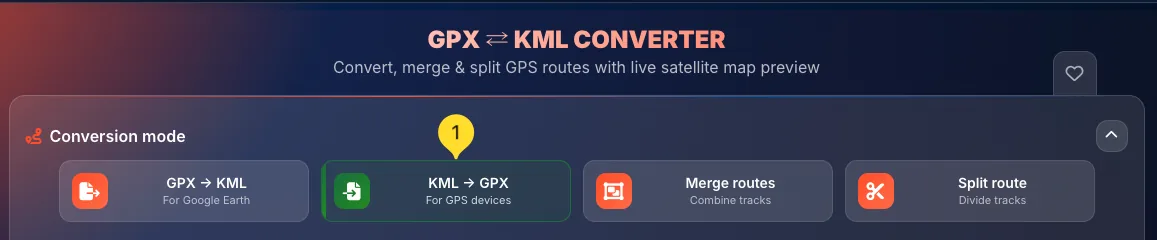
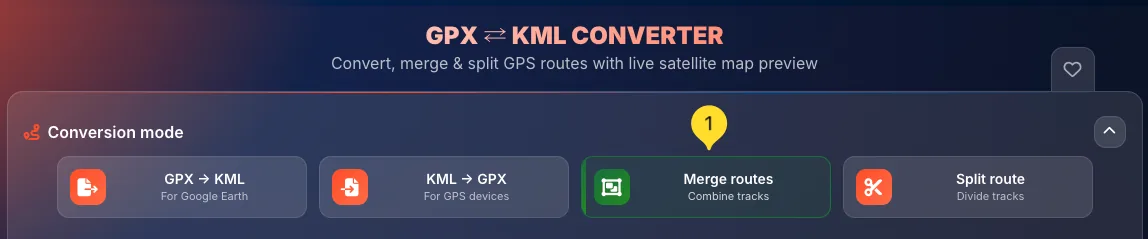
At the top, you'll see the Conversion mode panel with 4 mode buttons:
• GPX → KML: For Google Earth (convert GPX files to KML)
• KML → GPX: For GPS devices (convert KML files to GPX)
• Merge routes: Combine tracks (merge multiple files into one)
• Split route: Divide tracks (split one file into segments)
Click any button to switch modes.
Upload section (left)
Below the mode selector on the left side, you'll find the upload area. The section title changes based on the selected mode:
• GPX → KML mode: Upload GPX Files
• KML → GPX mode: Upload KML Files
• Merge routes mode: Upload files to merge
• Split route mode: Upload file to split
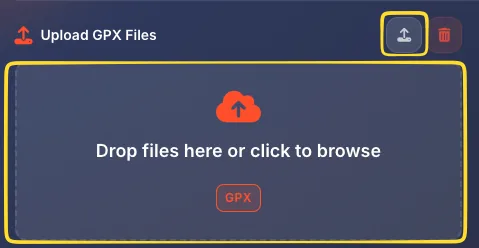
The upload area includes an upload button and a clear all button (trash icon) in the top-right corner.
Drop zone
Inside the upload section, you'll see a dashed-border drop zone with:
• An orange upload icon at the top
• Text - Drop files here or click to browse
• Format badges showing supported file types (GPX, KML, KMZ)
You can drag and drop files here or click to open the file browser.
Convert button (center)
In the middle of the screen, between the upload and output sections, you'll find the orange CONVERT button. Click this button after uploading files to start the conversion process.
Output section (right)
On the right side, you'll see the output section. The section title changes based on mode:
• GPX → KML mode - KML Output
• KML → GPX mode - GPX Output
• Merge routes mode - Merged output
• Split route mode - Split output
Before conversion, it shows Converted files will appear here with a placeholder icon. After conversion, your converted files appear here. The download button (download icon) is in the top-right corner.
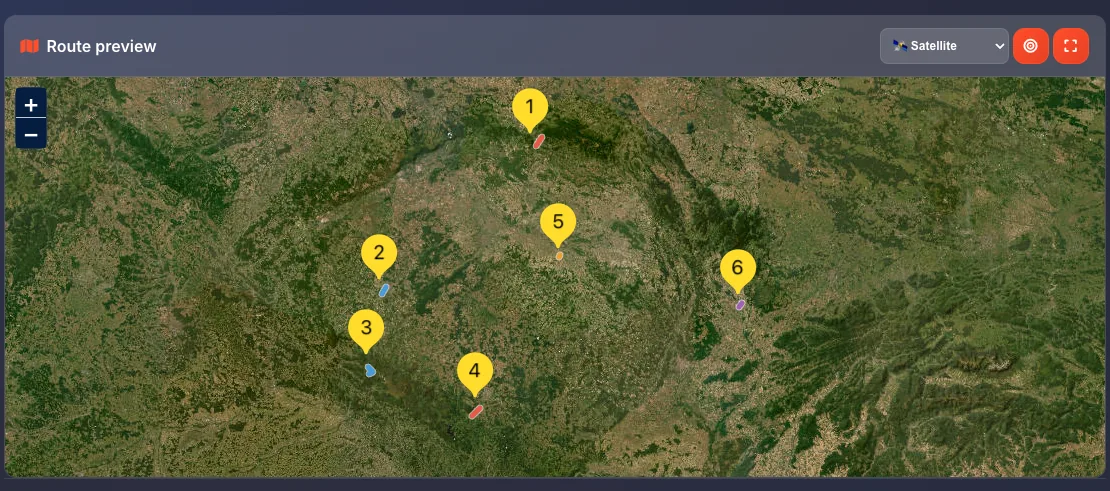
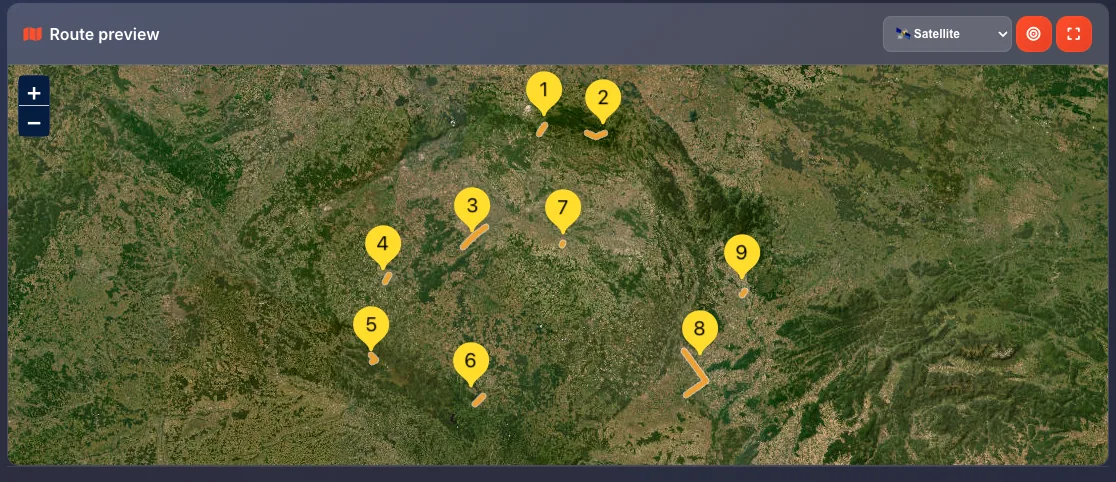
Route preview map
Below the conversion area, you'll find the Route preview section with a large interactive map. This shows your uploaded routes visualized on the map. The map has controls for:
• Zoom (+/-)
• Map type selector (Satellite, Street map, Topographic)
• Location button (center on route)
Fit all routes & Fullscreen
In the Route preview section header, you'll find two useful buttons:
• Fit all routes (target icon) - Click to automatically zoom and pan the map to show all uploaded routes at once. Useful when you have multiple routes spread across different areas.
• Fullscreen (expand icon) - Click to expand the map to full screen for a better view. Press Escape or click the button again to exit fullscreen mode.
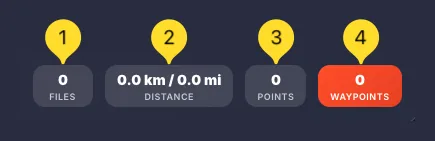
Statistics bar
At the very bottom of the screen, you'll see a statistics bar showing:
• FILES: Number of files uploaded
• DISTANCE: Total distance in km and miles
• POINTS: Total track points
• WAYPOINTS: Number of waypoints/markers
Favorites tab (right edge)
On the right edge of the screen, you'll find the Favorites tab (heart icon). Click it to add this tool to your favorites for quick access from the homepage.
Conversion modes
The GPX ⇄ KML Converter offers 4 different modes, each designed for a specific task. The mode buttons are located at the top of the screen in the Conversion mode panel. Each button shows:
• An icon representing the mode
• A title (e.g., GPX → KML)
• A description (e.g., For Google Earth)
Click any button to switch modes. The active mode is visually highlighted.
GPX → KML mode For Google Earth
This mode converts GPX files to KML format. KML files work with Google Earth, Google Maps, and other mapping applications that support the KML standard.
Select GPX → KML mode
Click the GPX → KML button (first button). It shows a file icon with an arrow and For Google Earth description. The button is highlighted when active.
Upload your GPX files
The upload section now shows Upload GPX Files. Drag and drop your .gpx files into the drop zone, or click the zone to browse for files. You can upload multiple files at once.
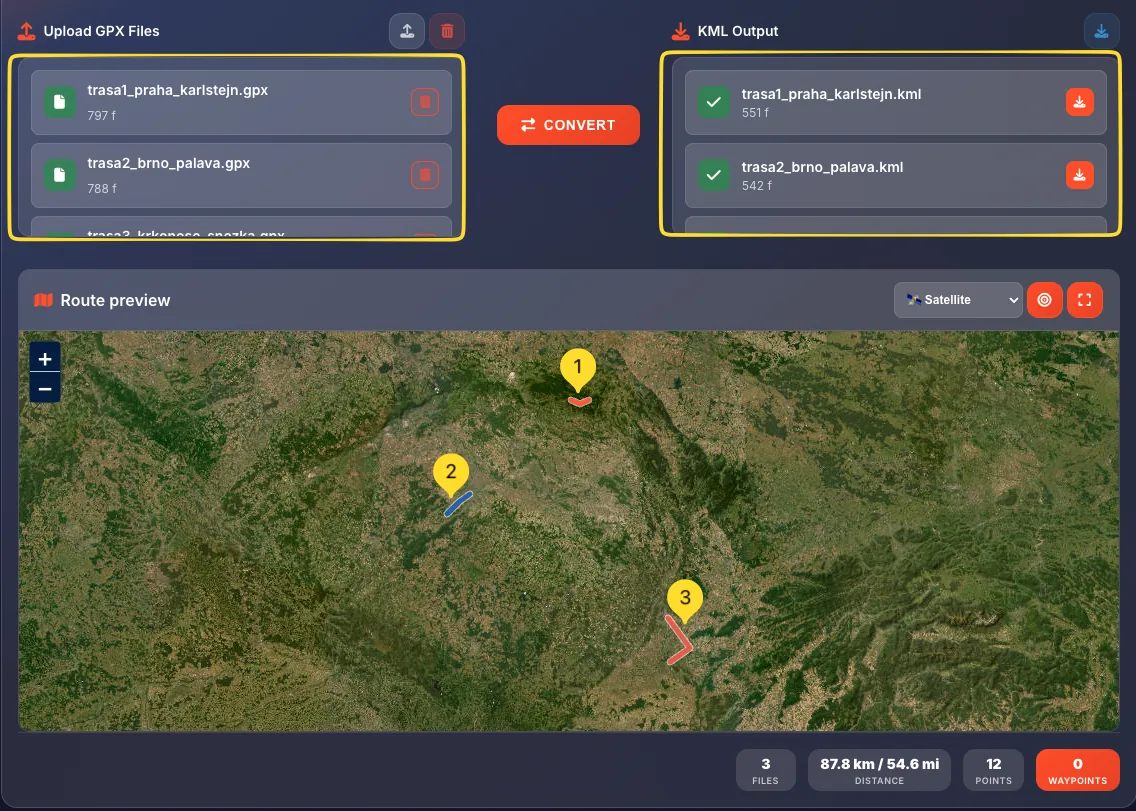
Review uploaded files
Uploaded files appear as a list showing:
• File icon (orange)
• File name (e.g., "trasa3_krkonose_snezka.gpx")
• File info (e.g., "801 f" = 801 features/points)
• Delete button (trash icon) to remove individual files
Preview on map
Your routes automatically appear on the map preview below. Verify that all routes look correct before converting.
Convert
Click the orange CONVERT button in the center. The tool processes your files and creates KML versions.
Download KML files
Converted files appear in the KML Output section on the right. Click the download button to download your KML files.
KML → GPX mode For GPS devices
This mode converts KML files to GPX format. GPX files work with GPS devices (Garmin, Suunto, etc.), fitness apps (Strava, Komoot), and outdoor navigation tools.
Select KML → GPX mode
Click the KML → GPX button (second button). It shows a file icon with an arrow and For GPS devices description.
Upload your KML files
The upload section now shows Upload KML Files. Drag and drop your .kml or .kmz files into the drop zone, or click to browse. The drop zone shows KML and KMZ badges indicating supported formats.
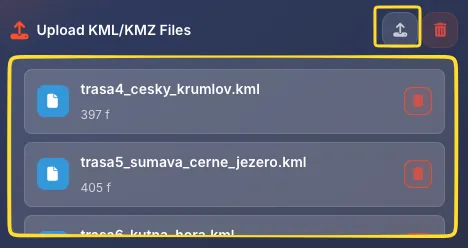
Review and preview
Uploaded files appear in the list. Check the map preview to verify your routes are loaded correctly.
Convert
Click the orange CONVERT button. The tool converts your KML data to GPX format.

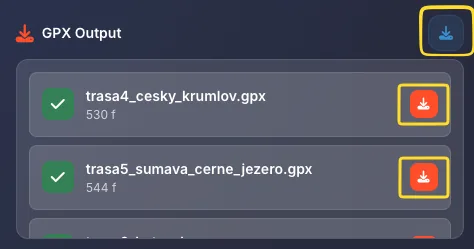
Download GPX files
Converted files appear in the GPX Output section. Click the download button to save your GPX files.
Merge routes mode Combine tracks
This mode combines multiple GPS files into a single file. Perfect for joining multi-day trips, combining separate recordings, or creating one route from several segments.
Select Merge routes mode
Click the Merge routes button (third button). It shows a layers icon and Combine tracks description.
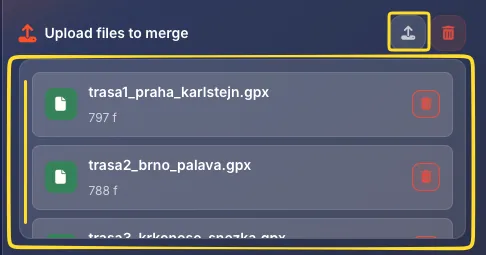
Upload files to merge
The upload section shows Upload files to merge. You can upload a mix of GPX, KML, and KMZ files - they don't all need to be the same format. Drop zone shows all three format badges.
Add multiple files
Upload at least 2 files to merge. Each file appears in the list with its name and point count. You can see all routes overlaid on the map preview.
Merge files
Click the orange CONVERT button. The tool combines all uploaded routes into a single file, preserving all track points, waypoints, and route data.
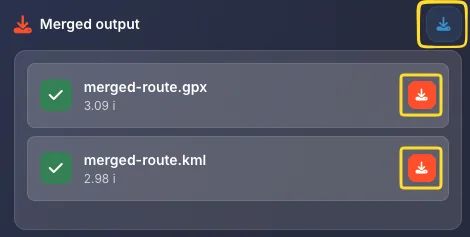
Download merged file
The combined file appears in the Merged output section. Download it to get a single file containing all your routes.
Split route mode Divide tracks
This mode divides a single GPS file into multiple segments. Useful for breaking up long routes, creating daily segments from a multi-day trip, or extracting specific portions.
Select Split route mode
Click the Split route button (fourth button). It shows a scissors icon and Divide tracks description.

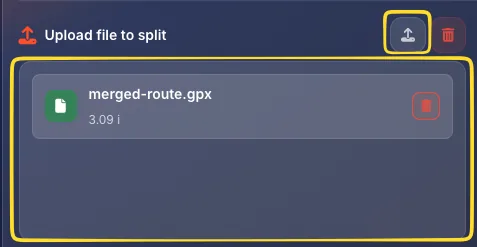
Upload file to split
The upload section shows Upload file to split. Upload the GPX or KML file you want to divide. Only one file is allowed in this mode - if you need to split multiple files, process them one at a time. The file appears in the list showing its track points.
Preview the route
Your route appears on the map. Review it to understand where you might want to split it.
Split and download
Click CONVERT to split the route. Multiple files appear in the Split output section. Download them individually or as a ZIP file.

Uploading files
The upload area is where you add your GPS files for processing. Here's how to use it:
Drag and drop
The easiest way - drag files from your computer and drop them onto the dashed-border drop zone. You'll see the zone highlight when a file is over it. Release to upload.
Click to browse
Click anywhere in the drop zone to open your system's file browser. Navigate to your files, select one or more, and click Open.
Upload button
Click the upload button in the top-right corner of the upload section. This also opens the file browser.
Multiple files
You can upload multiple files at once (except in Split mode which takes one file). Select multiple files by holding Ctrl (Windows) or ⌘ (Mac) while clicking.
File list
Uploaded files appear as cards showing:
• File icon: orange icon indicating file type
• File name: the original filename
• Info: number of features/points (e.g., "801 f")
• Delete button: trash icon to remove this file
Clear all files
Click the trash button in the top-right corner of the upload section to remove all uploaded files at once and start fresh.
Route preview map
The Route preview section shows an interactive map where you can see your uploaded GPS data visualized. This helps you verify that your files are correct before converting.
Map display
The map automatically shows your uploaded routes as colored lines on the terrain. Different tracks may appear in different colors for easy distinction.
Auto-fit bounds
When you upload files, the map automatically zooms and pans to show all your routes. If you have a route in France and another in Germany, the map will zoom out to show both.
Interactive navigation
You can interact with the map:
• Scroll to zoom in/out
• Click and drag to pan around
• Double-click to zoom in on a point
Waypoints and markers
If your GPS files contain waypoints (named locations like summits, rest stops, etc.), they appear as markers on the map. Click them to see the waypoint name.
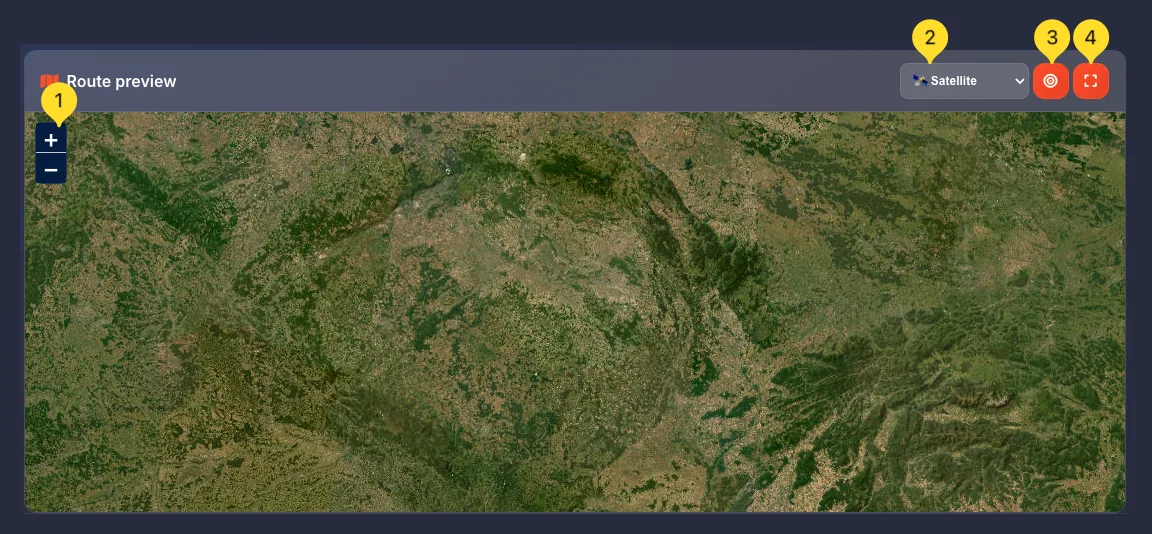
Map controls
The map has several control buttons in the top-right corner and zoom controls on the left:
Zoom controls (+/-)
On the left side of the map, you'll find zoom buttons:
• + button: zoom in (closer view, more detail)
• - button: zoom out (wider view, more area)
You can also use your mouse scroll wheel to zoom.
Map type selector
In the top-right corner, you'll see a dropdown showing the current map type (e.g., "Satellite" with a satellite icon). Click it to change the map style.
Location button
The location button (target icon) centers the map on your routes. If you've panned away, click this to snap back to your uploaded data.
Fullscreen button
The fullscreen button (expand icon) opens the map in fullscreen mode. Great for examining routes in detail on a larger view.
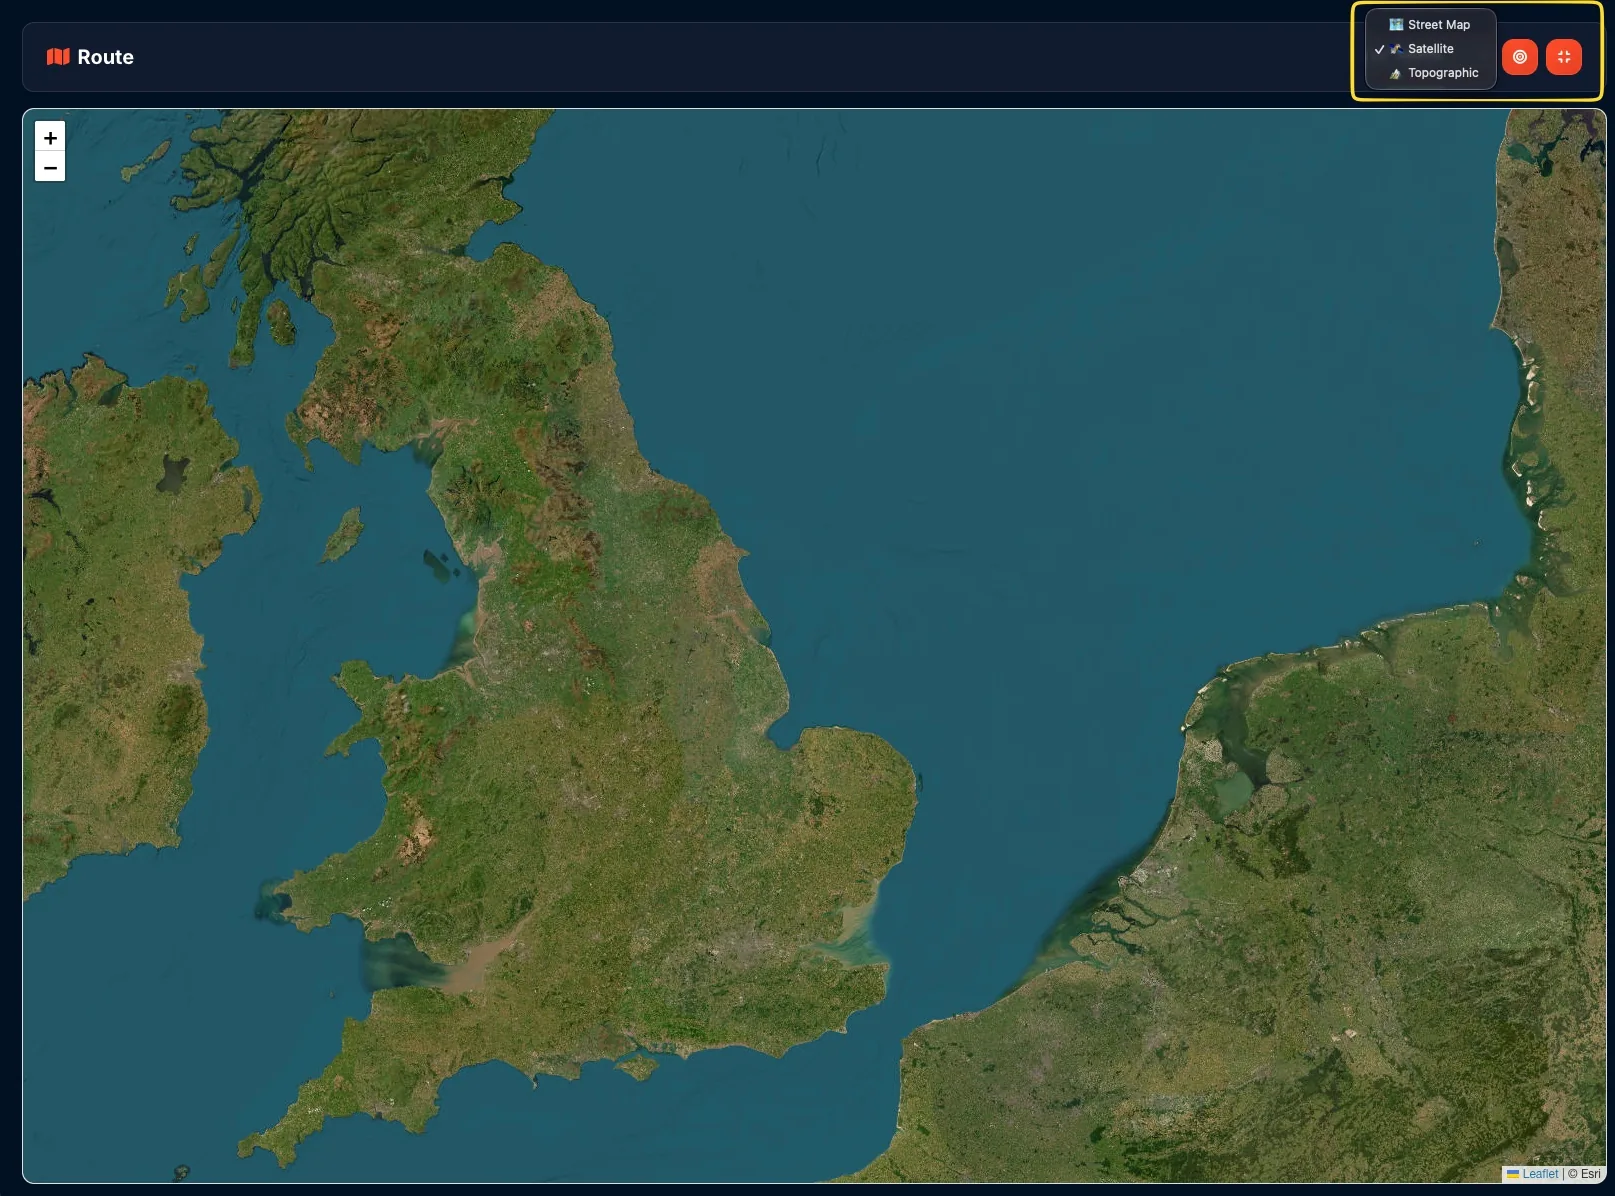
Map types
The map type selector lets you choose different base layers for the map. Click the dropdown in the top-right corner to see options:
Street map
Standard road map showing streets, cities, and labels. Best for urban routes and when you need to see street names and landmarks.
Satellite
Aerial/satellite imagery showing the actual terrain from above. Best for:
• Hiking and outdoor routes
• Verifying trail accuracy
• Seeing actual terrain features
• Impressive visual presentations
This is the default view (shown with a checkmark when selected).
Topographic
Contour map showing elevation lines and terrain relief. Best for:
• Mountain and hiking routes
• Understanding elevation changes
• Planning climbs and descents
• Outdoor adventure planning
Fullscreen mode
Fullscreen mode expands the map to fill your entire screen, perfect for detailed route examination or presentations.
Enter fullscreen
Click the fullscreen button (expand icon) in the top-right corner of the map. The map expands to fill your entire screen.
Fullscreen interface
In fullscreen mode, you'll see:
• Route header with the orange route icon in the top-left
• Map type selector (Satellite dropdown)
• Location button (orange)
• Exit fullscreen button (orange, replaces the expand button)
• Zoom controls (+/-) on the left
Navigate in fullscreen
All map controls work the same way in fullscreen. Pan around, zoom in/out, and change map types to examine your routes in detail.
Exit fullscreen
Click the exit fullscreen button (collapse icon) or press Escape on your keyboard to return to the normal view.
Statistics bar
At the bottom of the screen, you'll find the Statistics bar showing key metrics about your uploaded files. The statistics update automatically as you add or remove files.
FILES counter
Shows the number of files you've uploaded. Displayed as a number with "FILES" label below. Example: "3 FILES" means you have 3 GPS files loaded.
DISTANCE
Shows the total distance of all routes combined. Displayed in both metric and imperial units. Example: "45.2 km / 28.1 mi". This helps you understand the total length of your tracks.
POINTS counter
Shows the total number of track points across all files. Track points are the GPS coordinates that make up your routes. More points = more detailed routes. Example: "2,389 POINTS".
WAYPOINTS counter
Shows the number of waypoints (named locations) in your files. The counter has an orange background to stand out. Waypoints are markers like summits, campsites, or points of interest. Example: "12 WAYPOINTS".
Converting & downloading
After uploading your files, here's how to convert and download the results:
Click CONVERT
Once you've uploaded your files and verified them on the map, click the orange CONVERT button in the center of the screen. The button shows a swap/exchange icon.
Processing
The tool processes your files. For most files, this is nearly instant. Larger files with thousands of points may take a few seconds.
View results
Converted files appear in the output section on the right. The placeholder text Converted files will appear here is replaced with your actual converted files.
Download files
Click the download button (blue, download icon) in the top-right corner of the output section. Your converted file(s) will download to your computer.
Multiple outputs
In Split mode or when converting multiple files, you'll get multiple output files. They may be downloaded as a ZIP archive containing all results.
Supported formats
The GPX ⇄ KML Converter supports three main GPS file formats: