Overview
The Image Converter transforms images between 10 different file formats with full control over quality, transparency, and metadata. This client-side tool processes everything locally in your browser - your images never leave your device. Convert single images or entire batches with real-time preview and detailed statistics.
Interface overview Layout Guide
The Image Converter has a clean, organized layout with distinct areas for each function. Understanding the interface helps you work more efficiently.
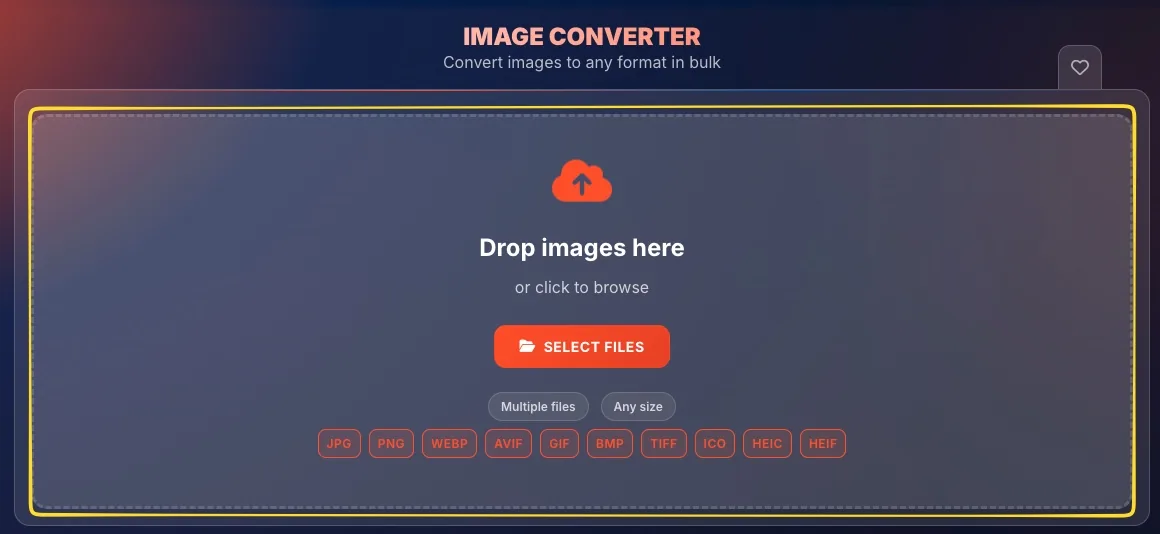
Drop zone (top)
The large area at the top where you upload images. Shows Drag & drop images here or click to browse message. Displays supported formats (JPG, PNG, WEBP, AVIF, GIF, BMP, TIFF, ICO, HEIC, HEIF) and badges showing Multiple files and Any size are supported.
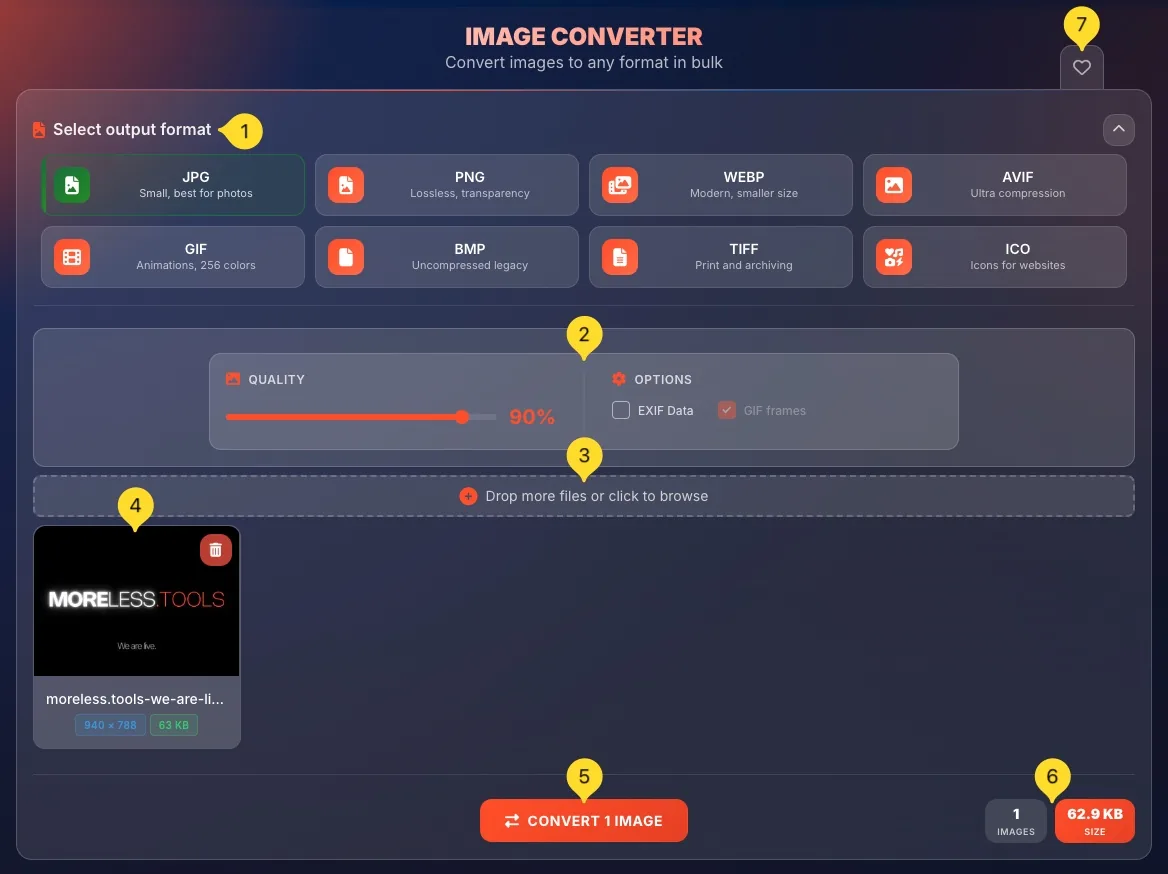
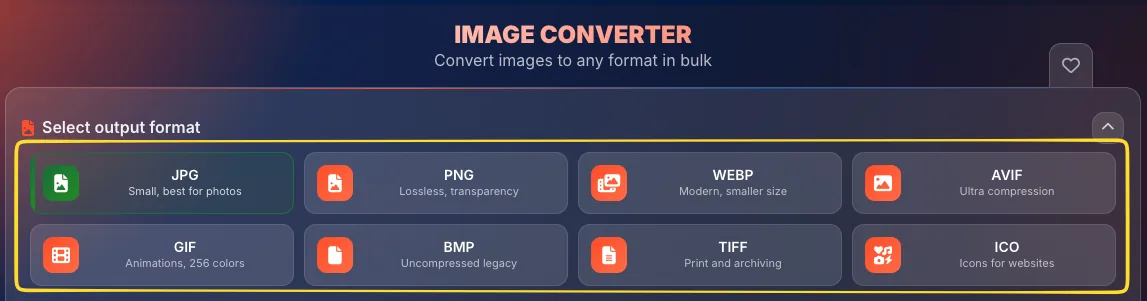
Output format selector
A row of 8 format buttons below the drop zone: JPG, PNG, WEBP, AVIF, GIF, BMP, TIFF, ICO. The selected format is highlighted in green. Click any format to select it as your output format.
Settings panel (center)
Located in the center, contains the QUALITY slider (for lossy formats only) and OPTIONS checkboxes. Settings change based on selected output format - some options appear or disappear depending on format capabilities.
Add more images
After uploading images, you can add more files using the Drop more files or click to browse area that appears below the initial drop zone.
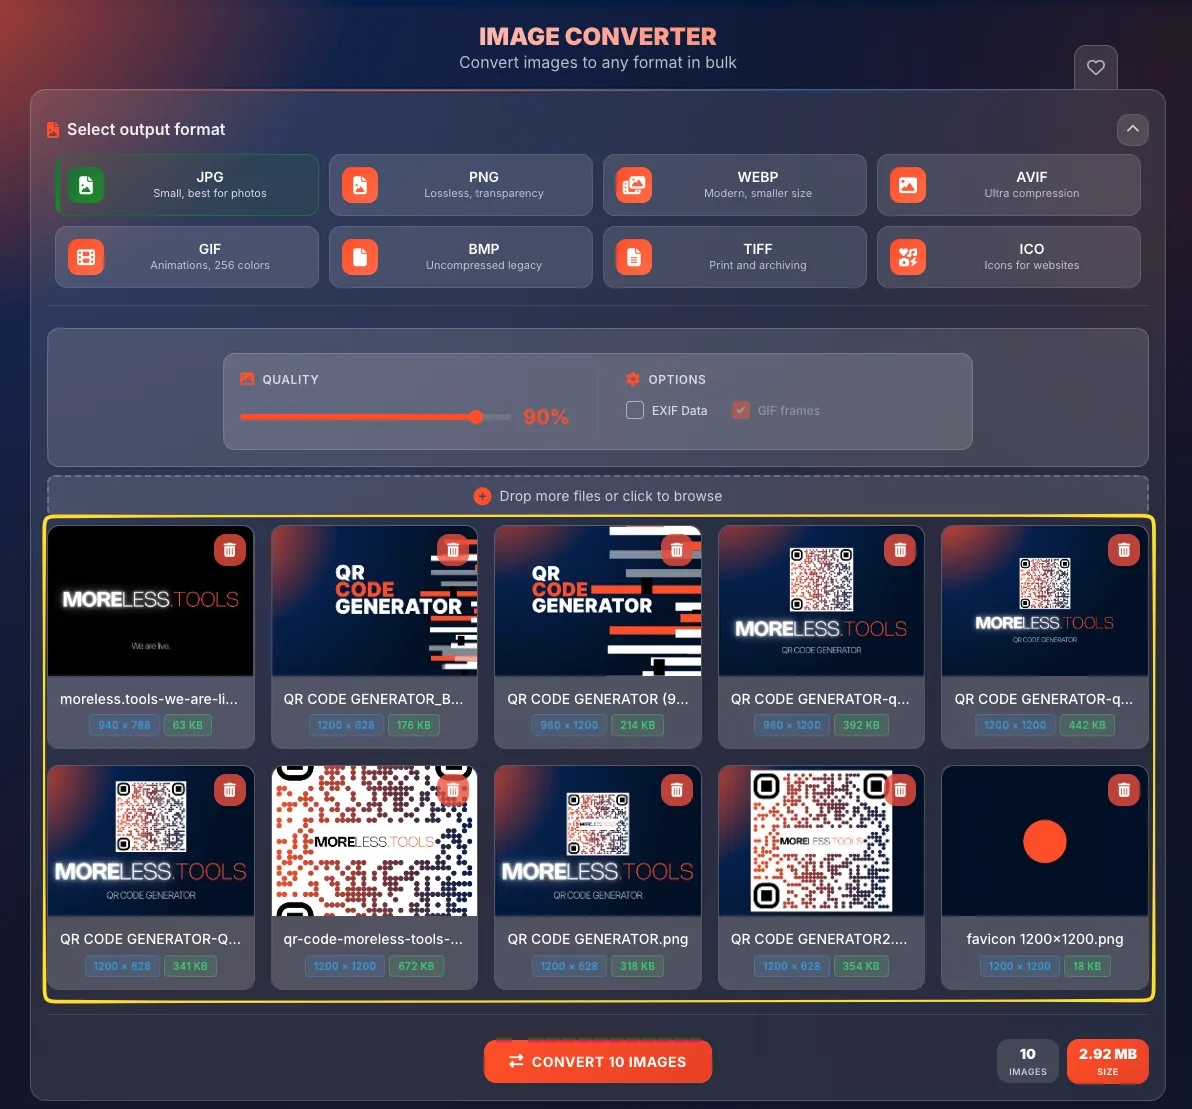
Image preview grid
Shows all uploaded images as thumbnails in a grid. Each image card displays - thumbnail, filename, dimensions (e.g., 192×192), file size (e.g., 4.24 KB), and a trash button to remove it.
Convert button
Large orange button showing CONVERT X IMAGES where X is the number of uploaded images. Click to start conversion.
Statistics panel
Shows real-time stats - IMAGES (count of uploaded files) and SIZE (total size in KB or MB).
Favorites button (top right)
The heart icon in the top right corner lets you add this tool to your favorites for quick access from the homepage.
Supported input formats
You can upload images in any of these 10 formats. The converter accepts all common image types including modern formats like AVIF and Apple's HEIC:
Output formats
Choose from 8 output formats. Each format has different characteristics - select based on your needs:
• Adjustable quality (1-100%)
• Smallest files for photos
• Universal compatibility
• No transparency
• Lossless (no quality slider)
• Full transparency support
• Sharp edges preserved
• Larger file sizes
• Adjustable quality
• Transparency support
• 25-35% smaller than JPG
• Growing compatibility
• Adjustable quality
• Best compression available
• HDR and transparency
• Newer browser required
• 256 color limit
• Basic transparency
• Animation support
• Universal compatibility
• Uncompressed (huge files)
• Zero quality loss
• No transparency
• Limited modern use
• Professional quality
• Large files
• Layer support
• Print industry standard
• Windows icon format
• Multiple sizes
• Used for web favicons
• Specialized format
Step 1: Upload images First Step
Start by adding images to the converter. You have multiple ways to upload files.
Drag and drop
The easiest method - simply drag image files from your computer and drop them onto the drop zone. The area will highlight when files are over it. You can drop multiple files at once.
Click to browse
Click anywhere on the drop zone to open your file browser. Navigate to your images and select them. Hold Ctrl (Windows) or ⌘ (Mac) to select multiple files.
Images appear in grid
After uploading, images appear in the preview grid below. Each shows a thumbnail, filename, dimensions, and file size. The CONVERT X IMAGES button updates with the count.
Step 2: Select output format Choose Format
Choose the format you want to convert your images to. The selected format affects available options.
View format options
Below the drop zone, you'll see 8 format buttons in a row: JPG, PNG, WEBP, AVIF, GIF, BMP, TIFF, ICO. One format is always selected (highlighted in green).
Click to select format
Click any format button to select it as your output format. The button turns green to indicate selection. This is the format your images will be converted to.
Settings panel updates
When you change formats, the Settings panel on the right updates automatically:
• JPG/WEBP/AVIF: Quality slider appears
• PNG/GIF: Transparency option appears
• BMP/TIFF/ICO: Minimal options

Consider your needs
Choose format based on your use case:
• Photos for web: JPG or WebP
• Graphics with transparency: PNG
• Smallest file size: AVIF or WebP
• Maximum compatibility: JPG or PNG
• Icons/favicons: ICO
Step 3: Quality settings Lossy Formats
For lossy formats (JPG, WebP, AVIF), you can control the compression quality. This slider only appears for formats that support quality adjustment.
Find the QUALITY slider
In the Settings panel on the right, look for the QUALITY section. It shows a slider from 10% to 100% with the current value displayed. Default is typically 90%.
Drag to adjust
Drag the slider left (lower quality, smaller files) or right (higher quality, larger files). The percentage updates as you drag. You can also click anywhere on the slider track.
Understanding quality values
90-100%: Highest quality, largest files. For archival or professional use.
80-89%: Excellent quality, good compression. Recommended for most uses.
60-79%: Good quality, noticeable compression. Fine for web thumbnails.
Below 60%: Visible artifacts. Only for very small file requirements.
Slider visibility
The Quality slider only appears for lossy formats:
• Visible: JPG, WebP, AVIF, GIF
• Hidden: PNG, BMP, TIFF, ICO (lossless or don't support quality adjustment)
Step 4: Configure options Advanced Settings
The OPTIONS section contains checkboxes that control specific conversion behaviors. Available options change based on your selected output format.
Transparency option
When visible: PNG, WebP output
What it does: Preserves transparent areas in your images. When checked, transparent pixels remain transparent. When unchecked, transparency is replaced with white (or background color).
Use case: Keep checked for logos, icons, or graphics with transparent backgrounds.
EXIF Data option
When visible: JPG output format only
What it does: EXIF data includes metadata like camera settings, date taken, GPS location, orientation. When checked, this data is preserved in JPEG output. When unchecked, metadata is stripped.
Technical note: EXIF preservation only works when converting to JPEG format due to library limitations. For other output formats, metadata is not preserved.
Use case: Uncheck to remove location data for privacy, or to reduce file size slightly. Keep checked for archival purposes.
GIF frames option
When visible: All formats except GIF output
What it does: Controls how animated GIF input files are handled. When checked, each animation frame is exported as a separate image file. When unchecked, only the first frame is converted.
Note: This option is hidden when output format is GIF (animation is preserved automatically). It's disabled (grayed out) when no animated GIFs are uploaded.
Options that change based on context
Some options change visibility or state based on context:
• GIF frames: Hidden when output is GIF (animation preserved automatically). Disabled (grayed out) when no animated GIFs are uploaded.
• Transparency: Only visible for PNG and WebP output formats.
Step 5: Review images Preview
Before converting, review your uploaded images in the preview grid. You can remove unwanted images or check details.
Image cards
Each uploaded image appears as a card in the grid. Cards show:
• Thumbnail: Visual preview of the image
• Filename: Original file name (e.g., "photo-123.jpg")
• Dimensions: Width × height in pixels (e.g., "192×192")
• File size: Original size (e.g., "4.24 KB")
Remove individual images
Each card has a trash icon button. Click it to remove that specific image from the conversion queue. The image count and statistics update automatically.
Grid organization
Images are arranged in a responsive grid. On wide screens, more images appear per row. On narrow screens, fewer images per row. All images are visible before conversion.
Verify before converting
Check that:
• All intended images are present
• No unwanted images are included
• File sizes are as expected
• Correct number shows in CONVERT X IMAGES button
Step 6: Convert & download Final Step
Once you've configured everything, convert your images and download the results.
Click Convert button
Find the large orange CONVERT X IMAGES button (where X is your image count). Click it to start the conversion process. All images will be converted using your selected format and settings.

Processing indicator
During conversion, you'll see a progress indicator. Large images or many files may take a few moments. The browser processes everything locally - no uploads to servers.

Download converted images
After conversion completes, download starts automatically:
• Single image: Downloads directly as a file
• Multiple images: Downloads as a ZIP file containing all converted images
• Files are named based on original names with new extension
Check the results
Open downloaded files to verify:
• Quality meets expectations
• Transparency preserved (if applicable)
• File sizes are reasonable
• All images converted correctly
Batch conversion Multiple Files
The Image Converter excels at batch processing. Convert hundreds of images at once with consistent settings.
Upload multiple files
Add all images at once:
• Drag & drop: Select multiple files and drag them all at once
• File browser: Hold Ctrl/⌘ while clicking to select multiple files
• Multiple uploads: Keep adding files - they accumulate in the grid
Same settings for all
All images in a batch use the same settings:
• Same output format
• Same quality level
• Same options (transparency, EXIF, etc.)
This ensures consistency across all converted images.
Review the queue
The image grid shows all queued files. Use trash buttons to remove any you don't want. The Statistics panel shows total count and combined size of all images.
Convert all at once
Click CONVERT X IMAGES to process the entire batch. All images convert in sequence. When finished, all converted images download automatically as a single ZIP file.
Format-specific options
Different output formats enable different options. Here's what's available for each format:
Transparency: Hidden (not supported)
EXIF Data: Yes (preserve metadata)
GIF frames: Yes (grayed out until animated GIF uploaded)
Transparency: Yes (preserve alpha channel)
EXIF Data: Hidden (JPEG only)
GIF frames: Yes (grayed out until animated GIF uploaded)
Transparency: Yes (preserve alpha)
EXIF Data: Hidden (JPEG only)
GIF frames: Yes (extract frames as individual images)
Transparency: Hidden (not supported)
EXIF Data: Hidden (JPEG only)
GIF frames: Yes (extract frames as individual images)
Options section: Entirely hidden (no applicable options for GIF output)
Transparency: Hidden (not supported)
EXIF Data: Hidden (JPEG only)
GIF frames: Yes (grayed out until animated GIF uploaded)
Statistics panel Live Info
The Statistics panel provides real-time information about your image queue. It updates automatically as you add or remove images.
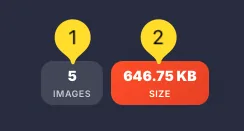
IMAGES counter
Shows the total number of images currently in the queue. For example - 5 IMAGES means you have 5 files ready to convert. Updates instantly when you add or remove images.
SIZE indicator
Shows the combined file size of all original images. Displayed in KB (kilobytes) or MB (megabytes) depending on total size. Example - 24.52 KB SIZE for small images, or 15.7 MB SIZE for larger batches.
Using statistics
Statistics help you:
• Track how many images are queued
• Estimate processing time (more images = longer)
• Understand total input size
• Plan output size expectations
Size after conversion
Note: Statistics show original file sizes, not converted sizes. Actual output size depends on:
• Output format (PNG larger than JPG)
• Quality setting (higher = larger)
• Image content (photos compress differently than graphics)
Common use cases
Tips & best practices
Frequently asked questions
• Lossless to lossless (PNG → PNG) - No quality loss
• Anything to PNG: No additional loss (but doesn't restore lost quality)
• Anything to JPG/WebP: Some quality loss depending on quality setting
• JPG → JPG: Each conversion loses more quality (avoid this)
• Keep animation: Select GIF as output format. The animation is preserved automatically.
• Extract frames: Select any other format and check the GIF frames option. Each animation frame exports as a separate image file (e.g., image-001.jpg, image-002.jpg, etc.).
• JPG → PNG (lossless is larger than lossy)
• Any format → BMP (uncompressed = huge)
• Small GIF → PNG (PNG has overhead for simple images)
Choose a format appropriate for your file type.