Overview
The PDF Image Converter is a bidirectional tool that transforms PDF pages into image files (PNG, JPG, WebP, TIFF) and combines multiple images into PDF documents. All processing happens locally in your browser - your files never leave your device.
Switching between modes
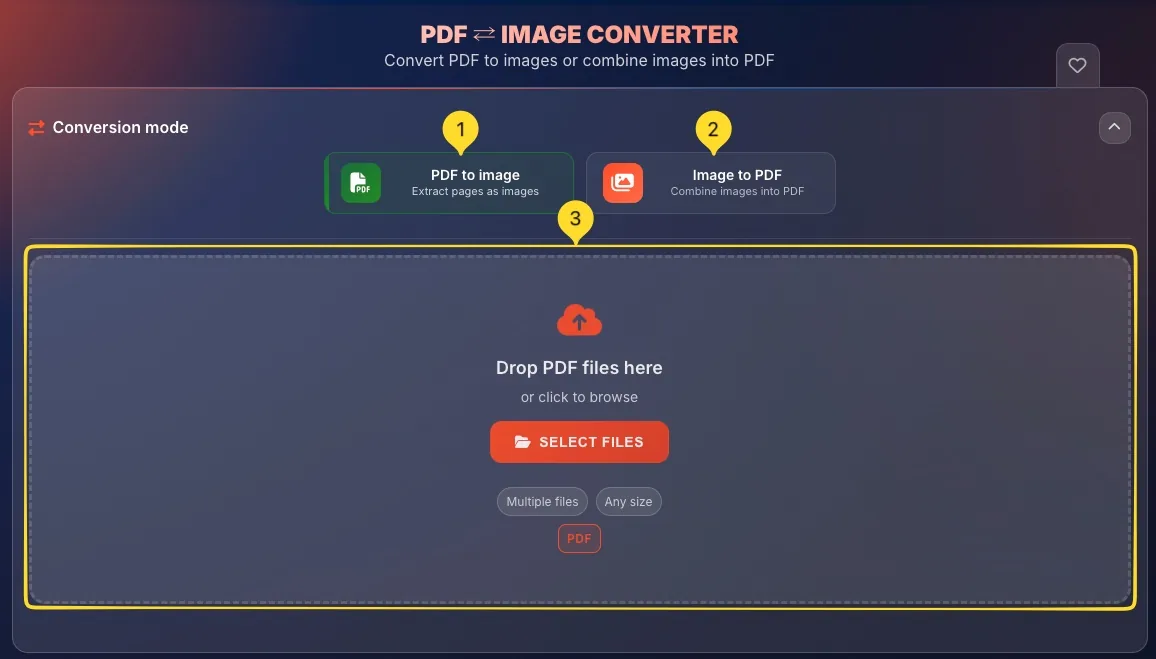
The tool has two conversion modes. You switch between them using the large mode buttons at the top of the tool.
Find the mode buttons
At the top of the tool, you see two large buttons side by side:
• PDF to Images: converts PDF pages into image files
• Images to PDF: combines images into a PDF document
Select your mode
Click the button for the conversion direction you need. The active mode button is visually highlighted.
Interface changes
When you switch modes, the entire interface changes:
• Different upload zone (PDF vs images)
• Different settings panels
• Different action buttons
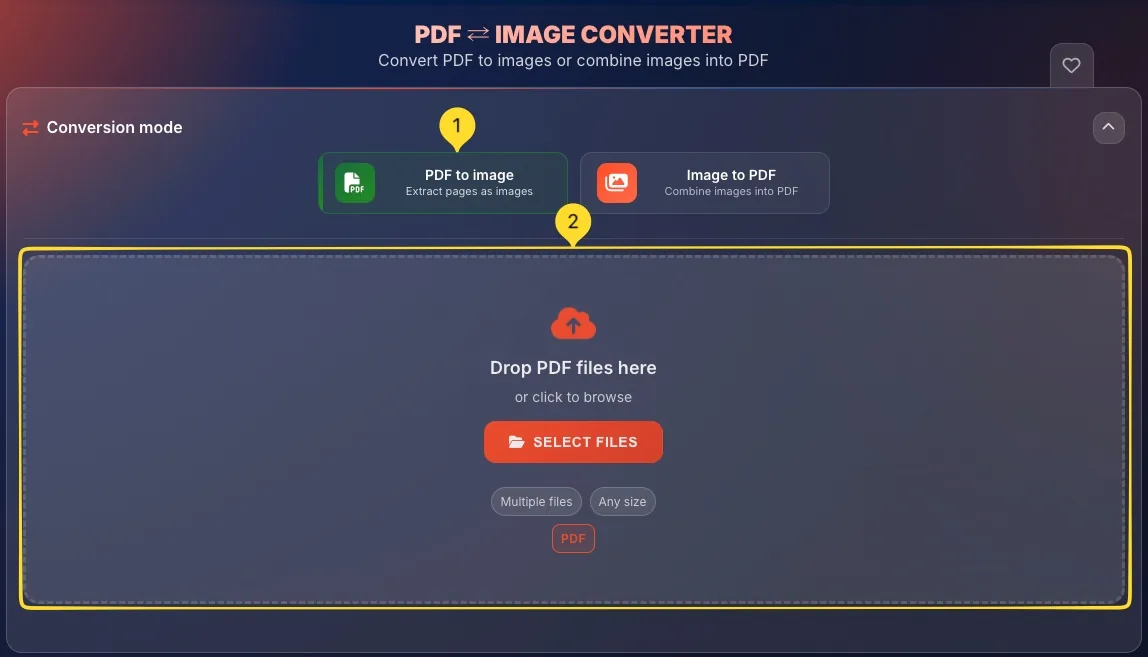
PDF to images mode PDF → Images
This mode converts PDF pages into individual image files. Each page becomes a separate image that you can share, edit, or use anywhere.
Select PDF to Images mode
Click the PDF to Images button at the top. Make sure it's visually highlighted when active.
Upload your PDF
Click the upload zone or drag and drop your PDF file. You'll see the text Drop PDF files here or click to browse with a cloud icon. Only PDF files are accepted in this mode.
Configure settings
In the left panel, configure:
• FORMAT: output image format
• SIZE: DPI resolution
• MAX DIMENSIONS: optional size limit
• EXTRA SETTINGS: additional options
Select pages (optional)
Click the Edit Pages button to open the page selection modal. By default, all pages are selected. You can choose specific pages to convert.

Convert
Click the orange CONVERT TO IMAGES button at the bottom. The tool processes each selected page and creates image files.

Download results
After conversion, download your images. If Download as ZIP is enabled, you get one ZIP file. Otherwise, each image downloads separately.
Format options (PDF → Images)
Choose the output image format based on your needs. Each format has different strengths:
Size & DPI settings
The SIZE section controls the resolution (DPI - dots per inch) of your output images. Higher DPI means sharper images but larger files.
Find the SIZE section
Below the FORMAT dropdown, you'll see the SIZE section with a DPI slider.
Use the slider
Drag the slider left or right to adjust DPI. The default is 150 DPI which is good for screen viewing.
Enter exact value
To the right of the slider, there's an input field showing the current DPI value. You can type an exact number here for precise control.
Choose appropriate DPI
72 DPI: basic screen viewing, smallest files
150 DPI: good screen quality (default)
300 DPI: print quality
600 DPI: high-quality printing, large files

Max dimensions (optional)
Limit the maximum width and height of output images in pixels. This is useful when you need images that fit specific size requirements.
Find MAX DIMENSIONS section
Below the SIZE slider, you'll see MAX DIMENSIONS (OPTIONAL) with two input fields side by side.
Set maximum width
In the left field (labeled "Width"), enter the maximum width in pixels. Leave empty for no limit.
Set maximum height
In the right field (labeled "Height"), enter the maximum height in pixels. Leave empty for no limit.
How it works
If you set 1920 × 1080, images larger than this will be scaled down proportionally. Images smaller than this limit won't be enlarged. Aspect ratio is always preserved.

2560 × 1440: 2K screens
3840 × 2160: 4K screens
1200 × 1200: Social media safe size
Extra settings (PDF → Images)
Click the EXTRA SETTINGS header to expand additional options for PDF to image conversion:
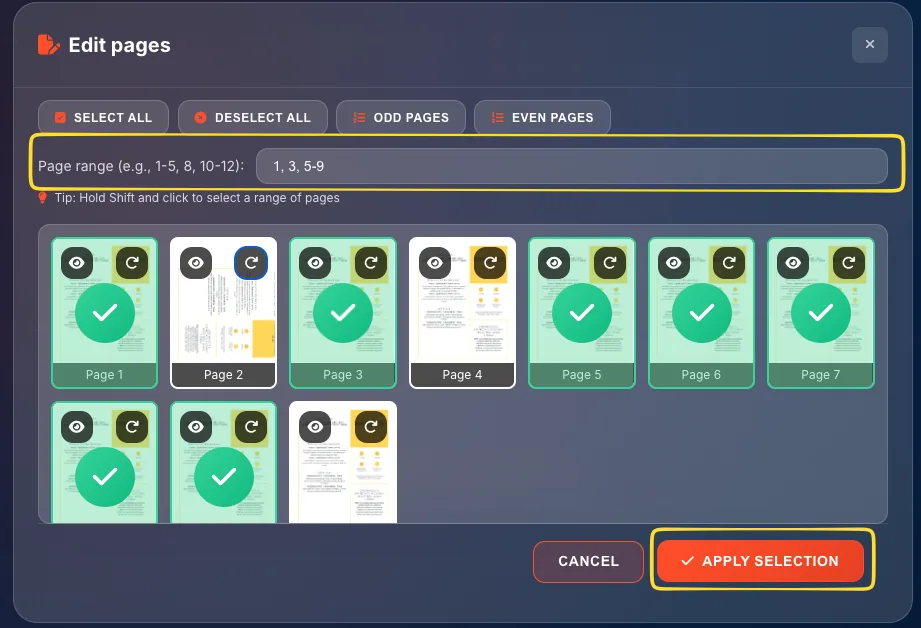
page_001.png, page_002.png, etc. Makes it easy to keep pages in order.document_page1_300dpi.png. Useful for organization.Edit pages modal Page Selection
The Edit Pages modal lets you select which pages to convert and preview or rotate individual pages.
Open the modal
After uploading a PDF, click the Edit Pages button to open the page selection modal.
Quick selection buttons
At the top, you'll find quick selection buttons:
• Select all: selects every page
• Deselect all: clears all selections
• Odd pages: selects pages 1, 3, 5, 7...
• Even pages: selects pages 2, 4, 6, 8...
Page range input
Use the input field to enter specific pages or ranges:
• 1,3,5 - individual pages
• 1-5 - page range
• 1-3,7,10-12 - mixed
Click thumbnails
Click any page thumbnail to toggle its selection. Selected pages show a checkmark or highlight. Unselected pages appear dimmed.
Preview a page
Hover over a thumbnail and click the eye icon to see a larger preview of that page.
Rotate a page
Click the rotation icon on a thumbnail to rotate that page 90° clockwise. Click multiple times for 180° or 270° rotation.
Confirm selection
Click Apply selection or the close button to apply your selection and return to the main interface.
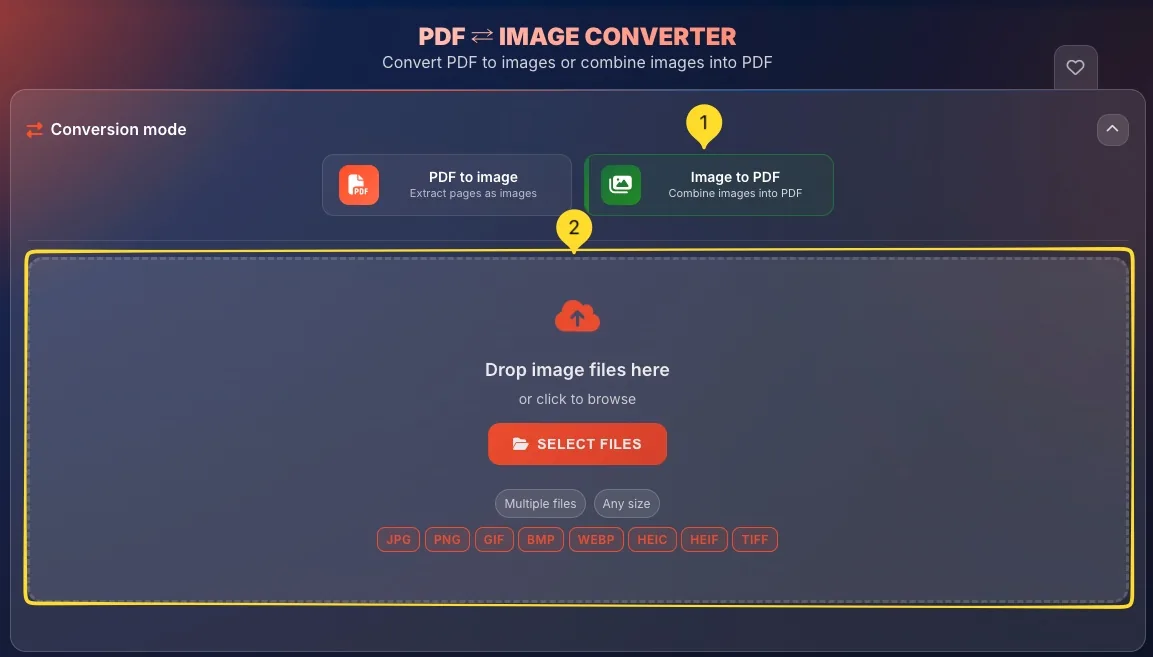
Images to PDF mode Images → PDF
This mode combines multiple images into a single PDF document. Perfect for creating photo albums, digitizing documents, or compiling screenshots.
Select Images to PDF mode
Click the Images to PDF button at the top. Make sure it's visually highlighted when active.
Upload your images
Click the upload zone or drag and drop image files.
Supported formats: JPG, PNG, GIF, BMP, WebP, HEIC, HEIF, TIFF
You can add multiple images at once.
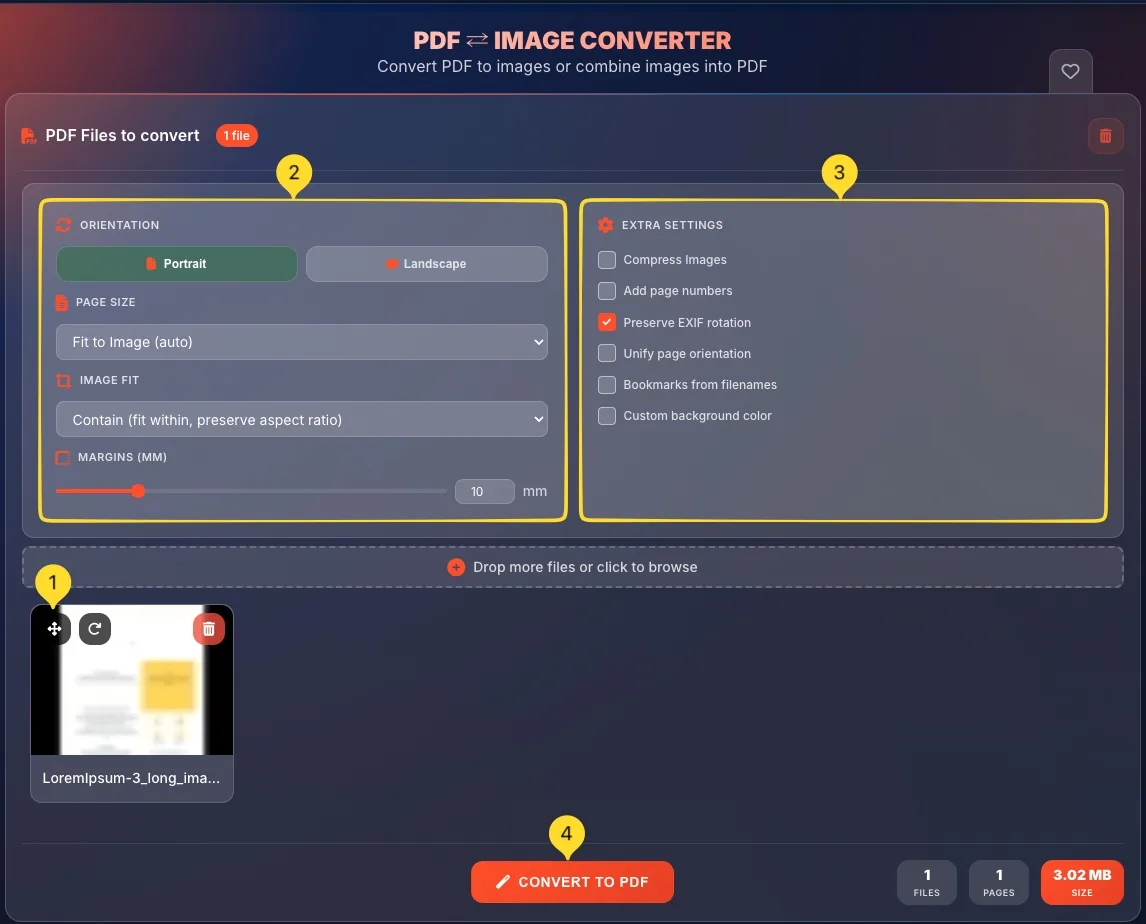
Arrange image order
Images appear as thumbnails in the order they'll be in the PDF. Drag and drop thumbnails to rearrange. The first image becomes page 1.
Configure layout settings
In the left panel, set:
• ORIENTATION: Portrait or Landscape
• PAGE SIZE: A4, Letter, or fit to image
• IMAGE FIT: how images fill the page
• MARGINS: space around images
Enable extra features
Expand EXTRA SETTINGS for options like compression, page numbers, bookmarks, and background color.
Convert to PDF
Click the orange CONVERT TO PDF button at the bottom. The tool creates your PDF and downloads it automatically.
Layout settings (Images → PDF)
Control how your images are arranged on PDF pages:
• Cover: fills page, may crop edges
• Stretch: fills page, may distort
Extra settings (Images → PDF)
Click EXTRA SETTINGS to expand powerful additional options:
Managing images
After uploading images, you can reorder, rotate, or remove them before creating the PDF.
View image thumbnails
Uploaded images appear as thumbnails in a grid. Each thumbnail shows a preview of the image and its filename.
Reorder by dragging
Drag the handle (grip icon) on any thumbnail to move it. Drop it in the desired position. The order here is the page order in the PDF.
Rotate an image
Click the rotation icon on a thumbnail to rotate that image 90° clockwise. Click multiple times for 180° or 270°.
Delete an image
Click the trash icon or X on a thumbnail to remove that image from the list. It won't be included in the PDF.
Add more images
You can add more images anytime by clicking the upload zone again or dragging additional files.
Statistics bar
The bottom bar shows real-time information about your conversion and provides the main action button:
Common use cases
Frequently asked questions
• 150 DPI: good screen quality, balanced (recommended default)
• 300 DPI: print quality
• 600 DPI: professional printing, very large files
• JPG: for pages with photos or when you need smaller files
• WebP: for best compression with good quality
• TIFF: for professional archiving