Overview
The Text Diff Checker compares two pieces of text and highlights the differences. Whether you're reviewing document edits, comparing code changes, or checking if two texts are identical - this tool shows you exactly what was added, removed, or changed. Choose from 4 comparison modes (Line, Word, Character, Unified) to find differences at the level of detail you need.
Interface layout Overview
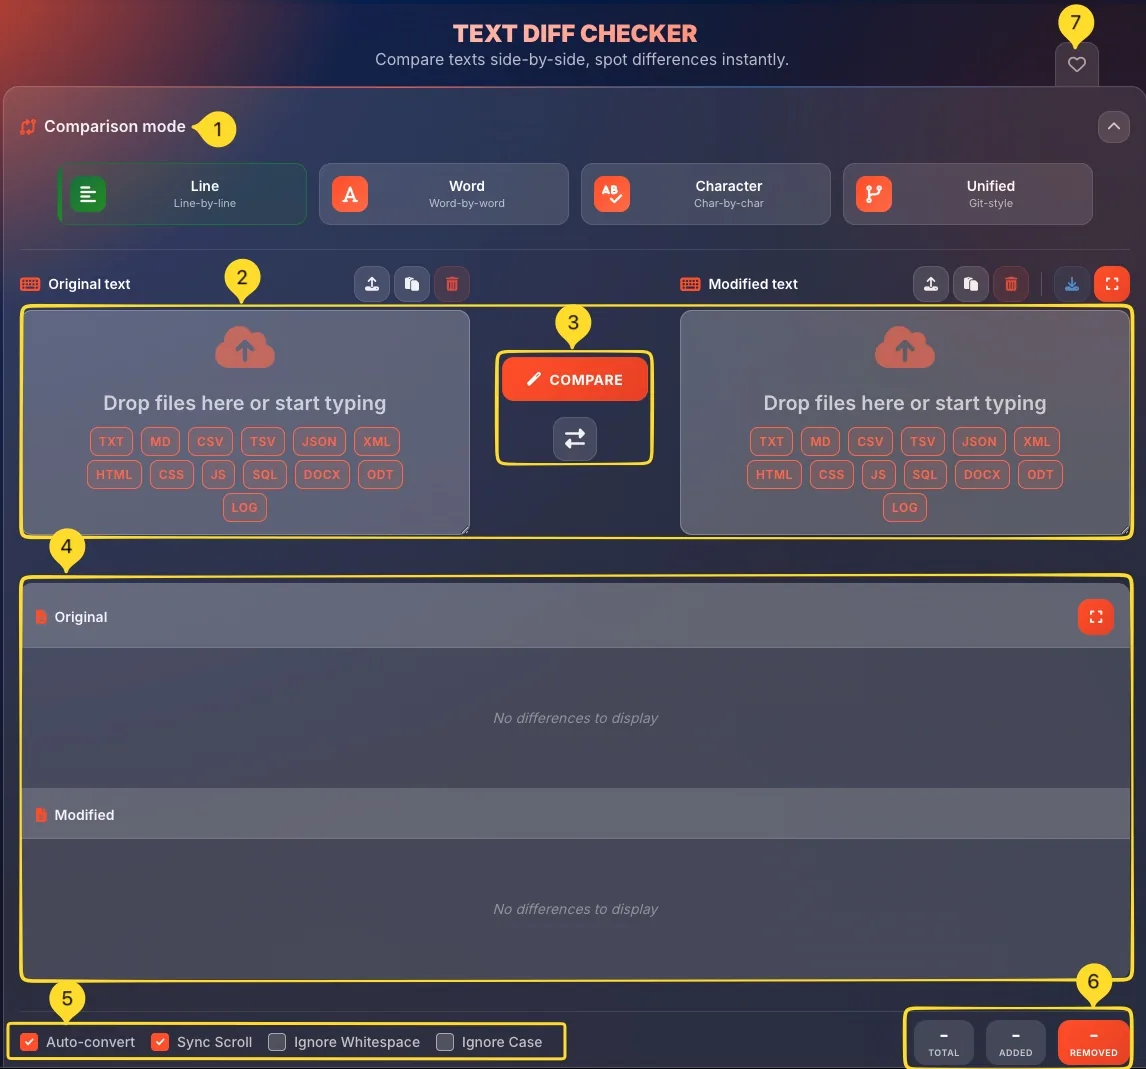
The Text Diff Checker interface is divided into several areas. Understanding the layout helps you work efficiently:
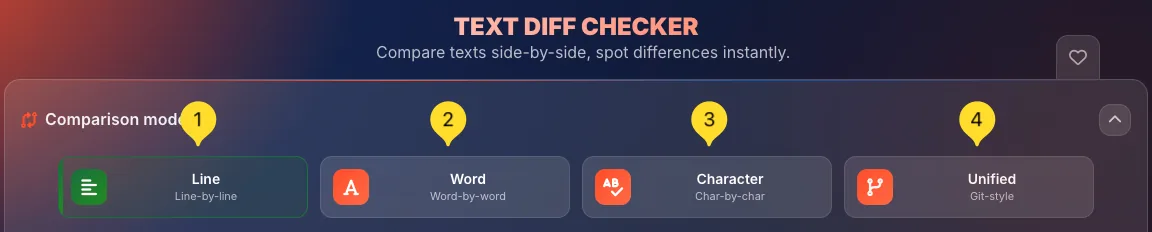
Comparison mode selector
At the top, you'll find 4 mode buttons:
• Line
• Word
• Character
• Unified
Input panels (side-by-side)
Below the mode selector are two text input areas:
• Original text (left) - for your base/old version
• Modified text (right) - for the changed/new version
Each panel has its own action buttons and supports drag-and-drop.
Action buttons
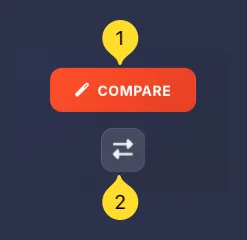
Between and around the input panels:
• COMPARE button - starts the comparison
• Swap button - exchanges the two texts
Diff result panels
After clicking COMPARE, two result panels appear below:
• Original result - shows deletions (what was removed)
• Modified result - shows additions (what was added)
Options bar
At the bottom, you'll find checkboxes for fine-tuning:
• Auto-convert
• Sync Scroll
• Ignore Whitespace
• Ignore Case
Statistics bar
Shows comparison stats:
• TOTAL changes
• ADDED lines/words
• REMOVED lines/words
Favorites tab
On the right edge of the screen, you'll find the Favorites tab. Click it to add this tool to your favorites for quick access from the homepage.
Comparison modes 4 Modes
Choose how detailed you want the comparison to be. Each mode analyzes differences at a different level:
Line mode (Line-by-line)
Compares entire lines at once. If any character in a line differs, the whole line is marked as changed.
Best for: Code comparisons, configuration files, structured data where each line is a logical unit.
Example: Changing color: red; to color: blue; marks the entire line as modified.
Word mode (Word-by-word)
Compares individual words. Shows exactly which words were added, removed, or changed while keeping unchanged words visible.
Best for: Document editing, prose, articles, emails - any natural language text.
Example: "The quick brown fox" vs "The fast brown dog" highlights "quick→fast" and "fox→dog".
Character mode (Char-by-char)
Compares every single character. The most detailed mode - shows exact letter-by-letter differences.
Best for: Finding typos, checking exact strings, verifying data entry, comparing short texts.
Example: "colour" vs "color" highlights the "u" as removed.
Unified mode (Git-style)
Shows differences in a single combined view (like Git diff output). Lines starting with - are removed, lines starting with + are added.
Best for: Developers familiar with Git, creating patch files, reviewing code changes.
Example: Shows - old line and + new line in sequence, similar to git diff output.
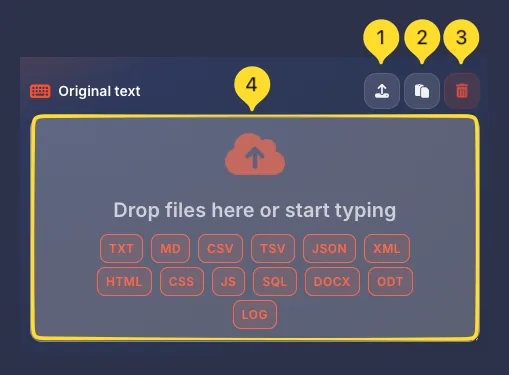
Original text panel Left Panel
The Original text panel (on the left) is where you enter your base version - the "before" or "old" text that you're comparing against:
Panel header
Shows Original text label with three action buttons on the right:
• Upload: Opens file browser
• Paste: Pastes from clipboard
• Clear: Removes all content
Upload button
Click the upload icon to open your file browser. Select any supported file type (TXT, MD, JSON, etc.). The file content loads into the text area automatically.
Paste button
Click the clipboard icon to paste text from your clipboard. This is the fastest way to input text you've already copied from another source.
Clear button
Click the trash icon to instantly remove all text from the panel. Use this to start fresh with new content.
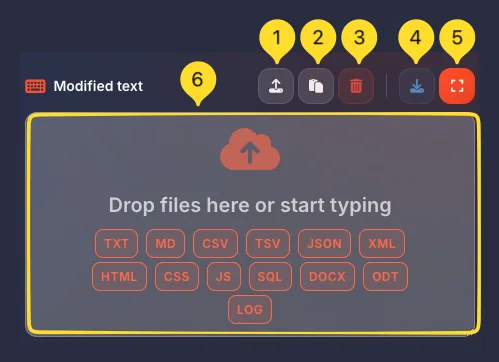
Drop zone
The main text area shows Drop your file here or type/paste text when empty. You can:
• Type text directly
• Paste with Ctrl/⌘+V
• Drag and drop a file onto the area
Supported formats are listed below the drop zone.
Modified text panel Right Panel
The Modified text panel (on the right) is where you enter your changed version - the "after" or "new" text with modifications:
Panel header
Shows Modified text label with five action buttons:
• Upload: Opens file browser
• Paste: Pastes from clipboard
• Clear: Removes all content
• Download: Saves the text
• Fullscreen: Opens fullscreen mode
Upload button
Same as Original panel - click to browse and select a file. The file content loads into this panel.
Paste button
Click to paste text from your clipboard into the Modified text area.
Clear button
Click the trash icon to clear all content from the Modified text panel.
Download button
Click the download icon to save the Modified text as a file. Useful for saving your edited version after comparing.
Fullscreen button
Click the expand icon to open the fullscreen "Text comparison" mode. This provides a larger workspace for comparing longer texts. See the Fullscreen mode section for details.
Supported file types
The Text Diff Checker supports 17 file formats for easy file-based comparison. Drag and drop or upload any of these file types:
Compare & Swap Actions
Between the input panels, you'll find two main action buttons that control the comparison:
COMPARE button
The large COMPARE button starts the comparison process:
How to use:
• Enter text in both Original and Modified panels
• Click the COMPARE button
• Wait for the analysis (instant for most texts)
• View results in the diff panels below
The button is prominent because it's the main action you'll use.
Swap button
The Swap button exchanges the content of both panels:
What it does:
• Original text moves to Modified panel
• Modified text moves to Original panel
When to use:
• You accidentally put texts in wrong panels
• You want to see the diff from the opposite perspective
• You want to reverse the "before/after" relationship
Re-comparing after changes
If you edit text after comparing:
• The diff results remain visible
• Click COMPARE again to update the results
• Changes in the input panels don't auto-update the diff
Diff result panels Results
After clicking COMPARE, two result panels appear below the input areas, showing the actual differences:
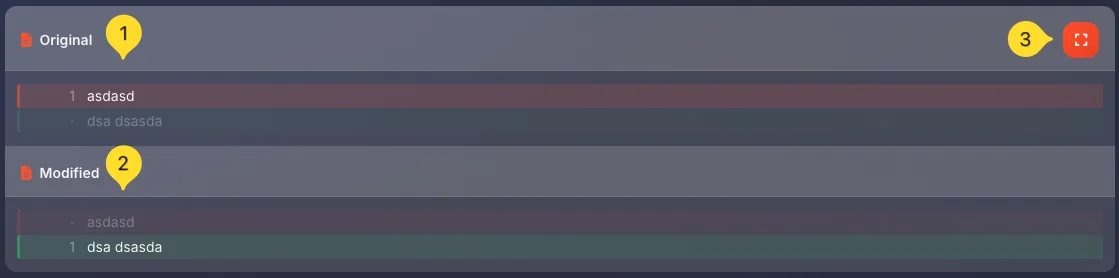
Original result panel
Shows the Original text with deletions highlighted:
• Text appears with the same content as your original input
• Deleted content (removed in modified version) is highlighted in red
• Unchanged content appears in normal styling
• Has a Fullscreen button to expand this panel
Modified result panel
Shows the Modified text with additions highlighted:
• Text appears with the same content as your modified input
• Added content (new in modified version) is highlighted in green
• Unchanged content appears in normal styling
• Located next to the Original result for easy side-by-side comparison
Side-by-side alignment
The two result panels are aligned side-by-side so you can:
• See both versions simultaneously
• Compare deletions (left) with additions (right)
• Understand what changed at a glance
With Sync Scroll enabled, scrolling one panel scrolls the other.
Fullscreen result view
Each result panel has a Fullscreen button:
• Click to expand that specific result panel
• Useful for reviewing long diffs
• Click again or press Escape to exit fullscreen
Comparison options 4 Options
At the bottom of the interface, you'll find 4 checkbox options that fine-tune how the comparison works:
Auto-convert
When enabled: Automatically re-compares whenever you type or paste text.
When disabled: You must manually click COMPARE to see differences.
Best practice: Enable for small texts, disable for large texts (to avoid lag while typing).
Sync Scroll
When enabled: Scrolling one result panel automatically scrolls the other panel to the same position.
When disabled: Each panel scrolls independently.
Best practice: Keep enabled to maintain alignment when reviewing long texts.
Ignore Whitespace
When enabled: Differences in spaces, tabs, and indentation are ignored.
When disabled: Every whitespace difference is highlighted.
Use cases:
• Enable for code (focus on logic, not formatting)
• Enable for reformatted documents
• Disable when whitespace matters (poetry, fixed-width data)
Ignore Case
When enabled: "Hello" and "hello" are treated as identical.
When disabled: Case differences are highlighted as changes.
Use cases:
• Enable for case-insensitive data
• Disable for code (case usually matters)
• Disable for formal documents where capitalization matters

Statistics bar Stats
The statistics bar provides a quick numerical summary of the comparison results:
TOTAL
Shows the total number of differences found between the two texts. This is the sum of additions and removals.
Interpretation:
• 0 = texts are identical
• Low number = minor changes
• High number = significant differences
ADDED
Shows how many lines/words/characters were added in the modified version (shown in green in the diff).
What counts as "added":
• New lines that didn't exist before
• New words inserted into existing lines
• Characters added to words (in character mode)
REMOVED
Shows how many lines/words/characters were removed from the original (shown in red in the diff).
What counts as "removed":
• Lines deleted entirely
• Words removed from sentences
• Characters deleted from words (in character mode)
Interpreting the stats
Example interpretations:
• ADDED > REMOVED = Content was expanded
• REMOVED > ADDED = Content was shortened
• ADDED = REMOVED = Content was replaced (same length)
• TOTAL = 0 = Texts are identical

Fullscreen mode 2 Fullscreen views
Text Diff Checker offers two fullscreen modes for expanded workspace - one for text input and one for diff results:
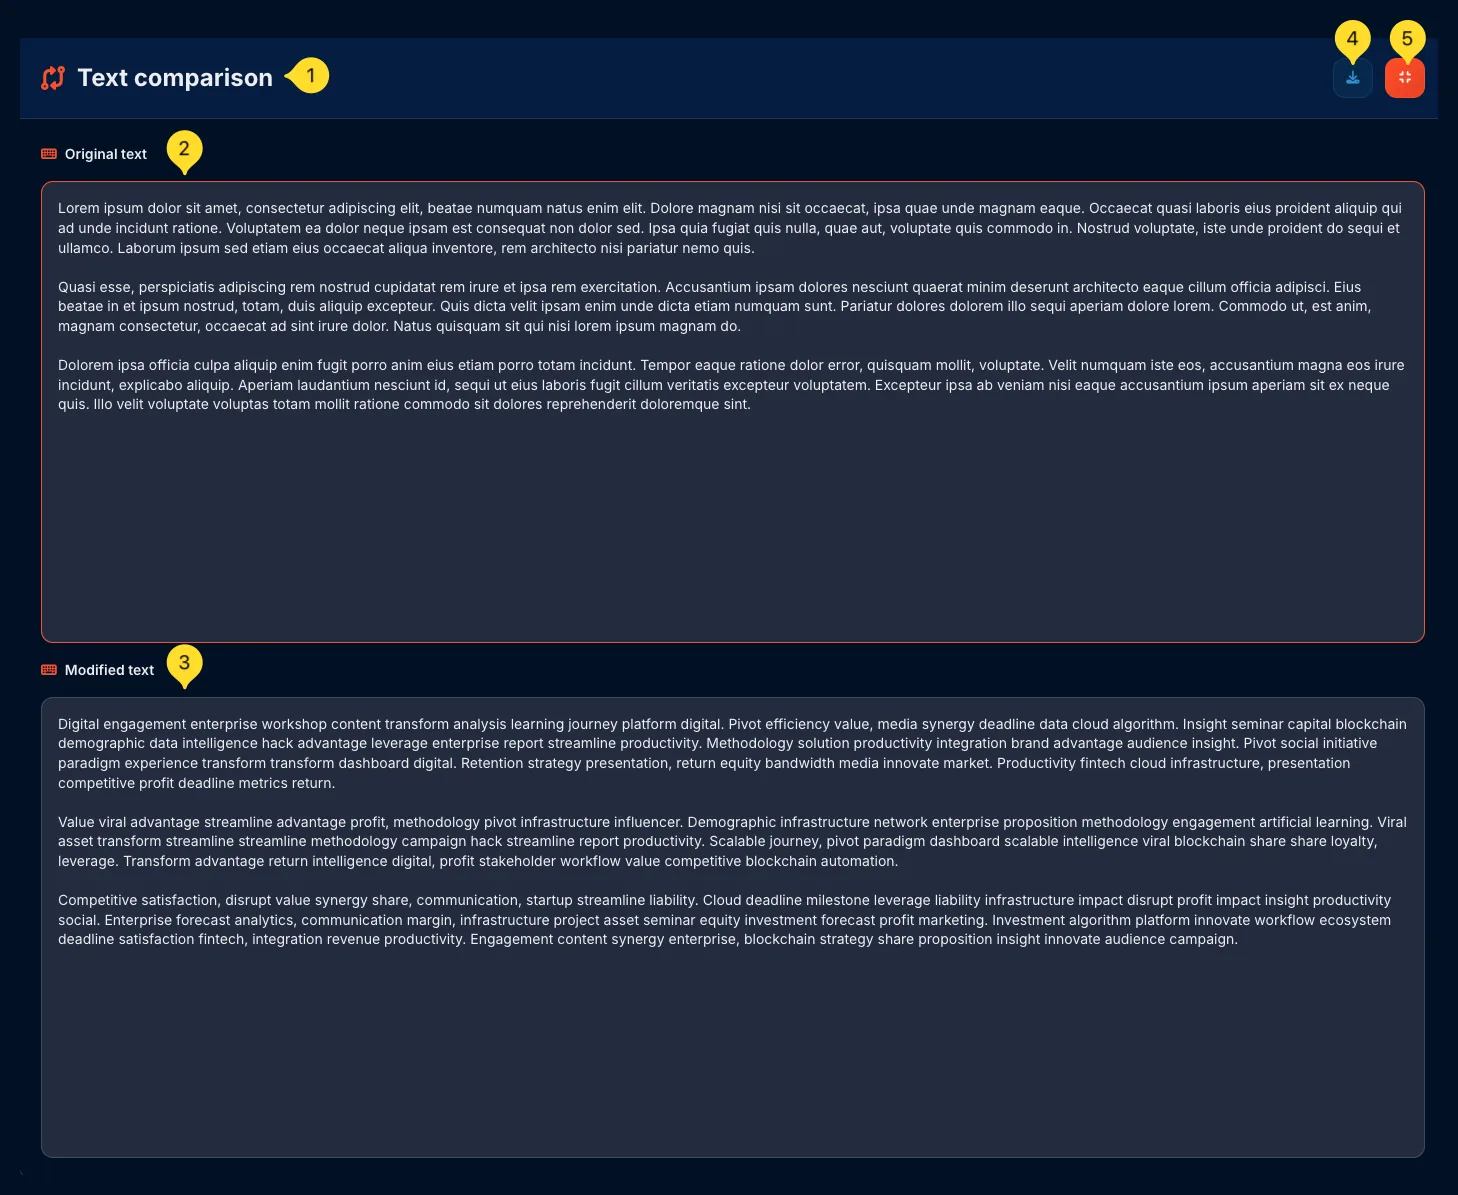
Text comparison fullscreen
Click the Fullscreen button in the Modified text panel header. This opens the "Text comparison" fullscreen view for editing and entering text before comparing.
Text comparison layout
In text comparison fullscreen, the panels are arranged vertically (stacked):
• Original text panel on top
• Modified text panel below
You can still edit text, drag and drop files, and use all input features.
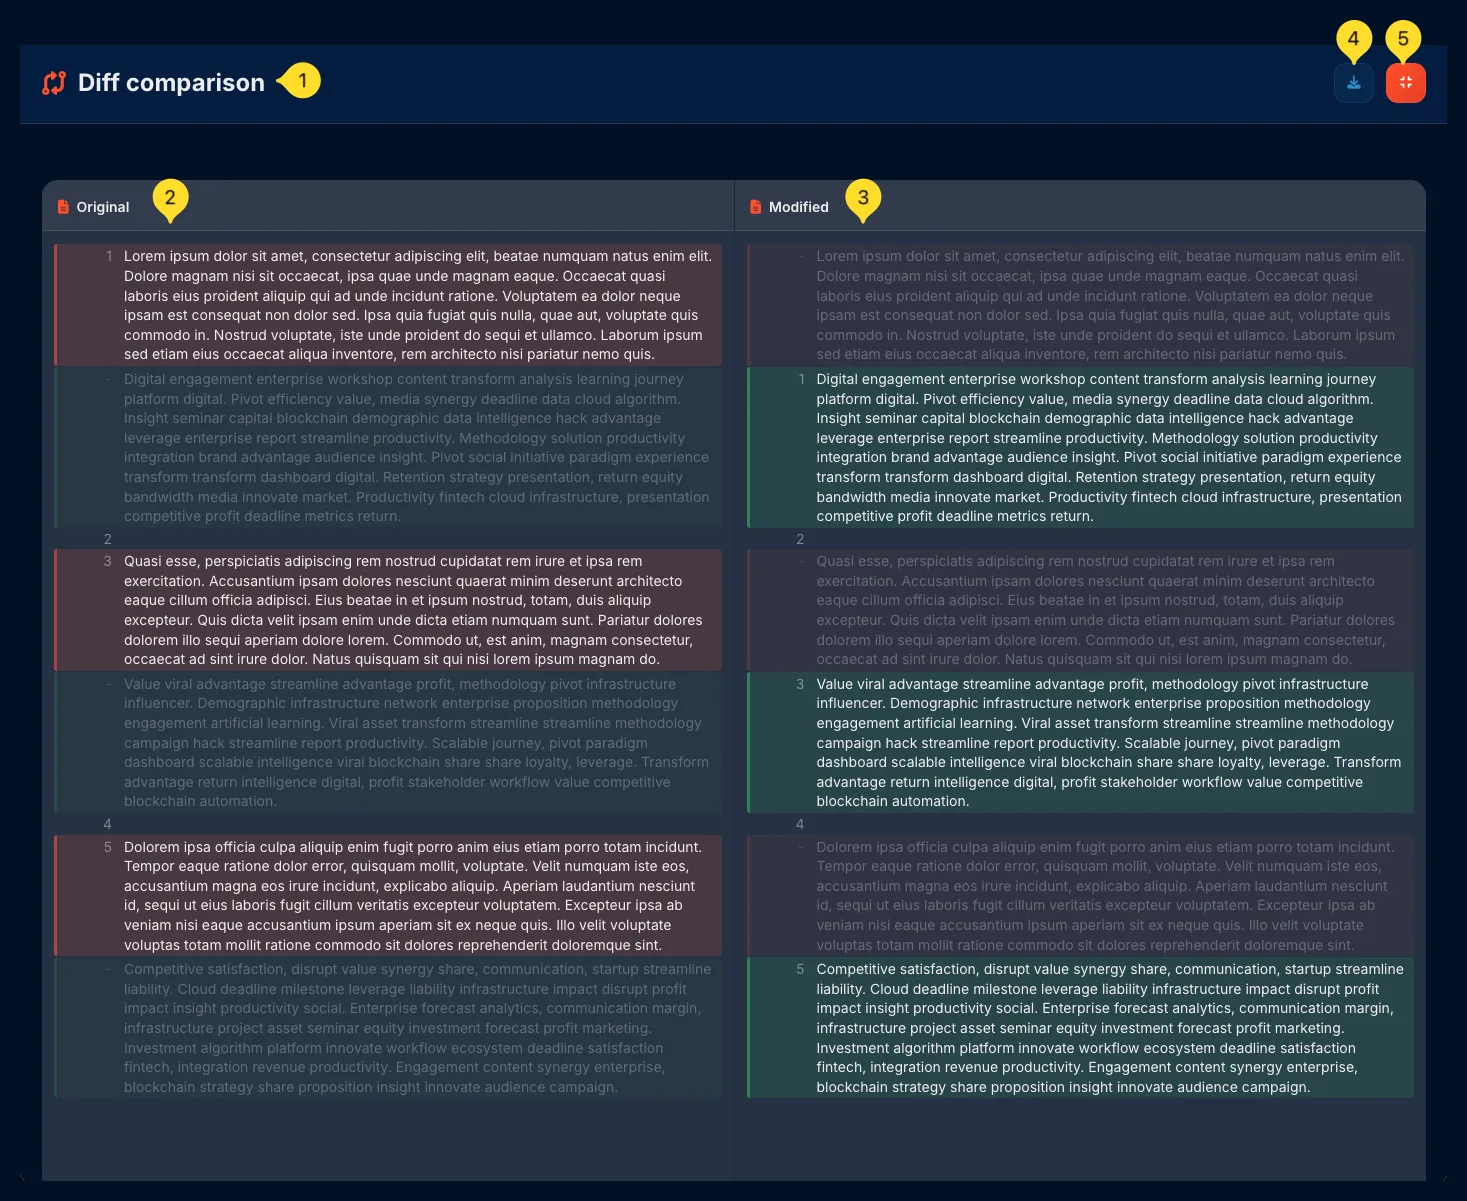
Diff comparison fullscreen
After running a comparison, click the Fullscreen button on either diff result panel (Original or Modified). This opens the "Diff comparison" fullscreen view for reviewing the highlighted differences.
Diff comparison layout
In diff comparison fullscreen, you see the full diff results with:
• All highlighted additions (green) and deletions (red)
• Larger viewing area for reviewing long diffs
• Export button to save the comparison results
Fullscreen header controls
Both fullscreen views have similar header controls:
• Title on the left (Text comparison or Diff comparison)
• Export/Download button: saves content or opens export modal
• Exit button: Returns to normal view
Exit fullscreen
To exit any fullscreen mode:
• Click the X button in the header
• Press the Escape key on your keyboard
• The view returns to the normal side-by-side layout
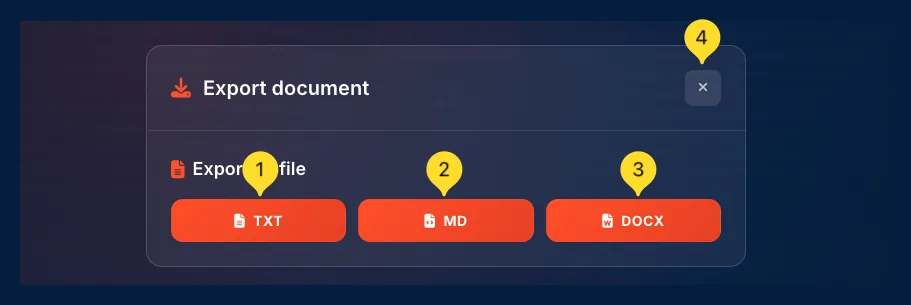
Export modal Save results
The Export document modal lets you save your comparison results in multiple formats for documentation, sharing, or record-keeping.
Open export modal
Click the Export/Download button in the diff comparison fullscreen header. The Export document modal opens with three format options.
Export as TXT
Click TXT to export the diff results as a plain text file (.txt). This preserves the text content without formatting - useful for basic documentation and logs.
Export as MD
Click MD to export the diff results as a Markdown file (.md). Markdown preserves some formatting and is perfect for documentation, GitHub READMEs, or note-taking apps.
Export as DOCX
Click DOCX to export the diff results as a Microsoft Word document (.docx). Open directly in Word, Google Docs, or any office application - ideal for reports and formal documentation.
Step-by-step guide Complete Workflow
Follow this complete workflow to compare two texts from start to finish:
Choose comparison mode
Before adding text, select your preferred comparison mode:
• Line: for code and structured data
• Word: for documents and prose (recommended default)
• Character: for finding exact character differences
• Unified: for Git-style diff output
Load the original text
Add your base/old version to the Original text panel (left):
• Type directly in the text area
• Paste using the Paste button or Ctrl/⌘+V
• Upload a file using the Upload button
• Drag and drop a file onto the panel
Load the modified text
Add your changed/new version to the Modified text panel (right):
• Use any of the same methods as for Original
• This is the "after" version you're comparing
Configure options
Set the comparison options based on your needs:
• Enable Sync Scroll for aligned viewing
• Enable Ignore Whitespace for code comparisons
• Enable Ignore Case if capitalization doesn't matter
Click COMPARE
Click the COMPARE button to run the comparison. The diff result panels will appear below showing the highlighted differences.
Review the differences
Examine the diff results:
• Red in Original = content that was removed
• Green in Modified = content that was added
• Check the Statistics bar for counts
• Use Sync Scroll to navigate both panels together
Use fullscreen if needed
For long texts, click Fullscreen on the Modified panel to expand the comparison view. Review changes in the larger workspace.
Download or copy results
When done:
• Use Download in fullscreen to save the comparison
• Copy specific sections as needed
• Click Clear to start a new comparison
Understanding color coding
The diff results use consistent color coding to indicate different types of changes:
Tips for effective comparison
Frequently asked questions
The tool supports 13 file formats: TXT, MD, CSV, TSV, JSON, XML, HTML, CSS, JS, SQL, DOCX, ODT, and LOG.